Aerial Photography: How to Take Epic Photos from Airplanes and Helicopters
Everything You Need to Know About Aerial Photography
the hearnes » adventure elopement photographers
We’ve been doing quite a bit of aerial photography recently and I wanted to compile a blog post with tips and advice for anyone before going up in the sky to take photos! Flying over places can offer such a unique perspective for photography, some of my very favorite landscape photos have been taken from airplanes or helicopters. As adventure wedding photographers, we get to fly above epic landscapes more often than the usual person, but you might be surprised how affordable flight seeing can be in places that are popular tourist destinations. Whether you go up in a small plane or in a helicopter, being able to view and photograph a destination from above is an amazing experience that we highly reccomend!
Gear List for Shooting Aerial Photos
I want to preface this by saying, this is our preferred gear list for aerial photography! That doesn’t mean it’s the only way to do things, but from our experience taking photos from airplanes and helicopters, these are the things we’ve decided are essentials.
For camera gear, we shoot with Canon 5D Mark IVs. They’re amazing cameras, super sturdy, weather-resistant, and the sensor is large enough that we can easily crop in photos, which is really helpful with aerial photography when you typically can’t bring yourself physically closer to the subject. For lenses, I prefer my Canon 24-70 2.8L or 16-35 2.8L, depending on the landscape and the aircraft. Callen prefers to shoot on a 70-200 2.8L because he finds those zoomed in shots more interesting. I like the photos he’s been getting with that lens, but if it were only one of us, I wouldn’t want to be limited to 70 as the “widest” you can go.
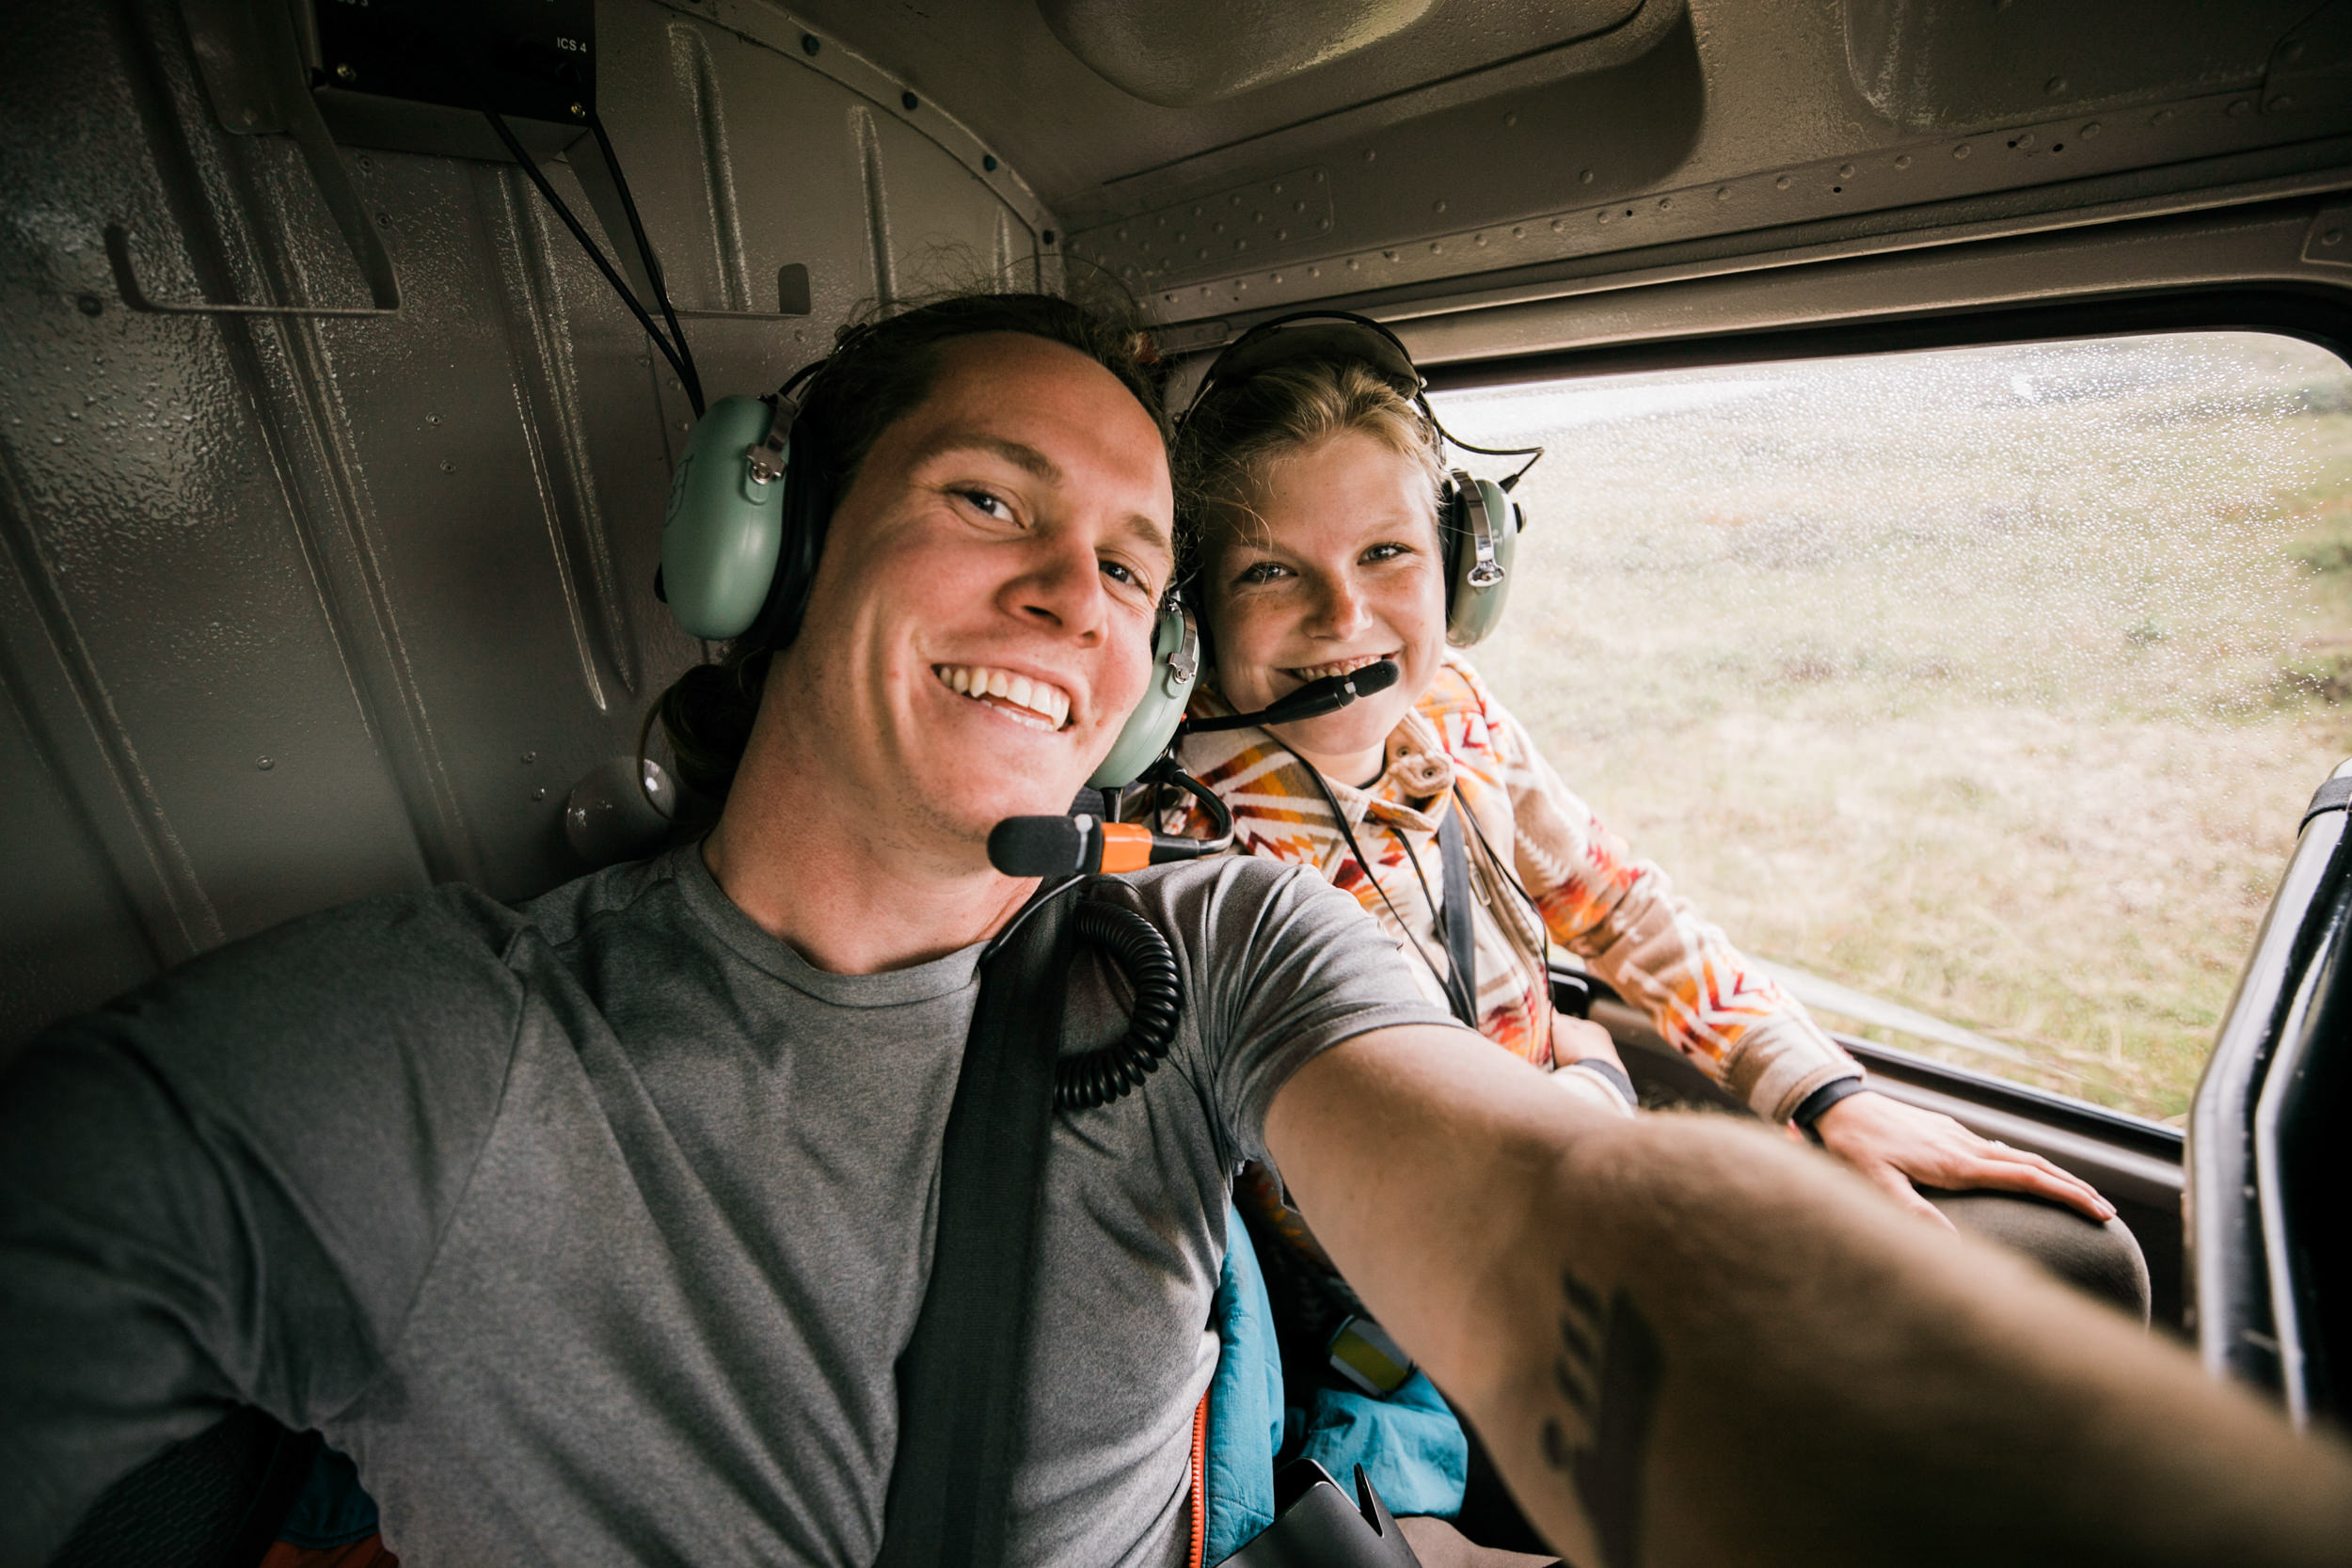
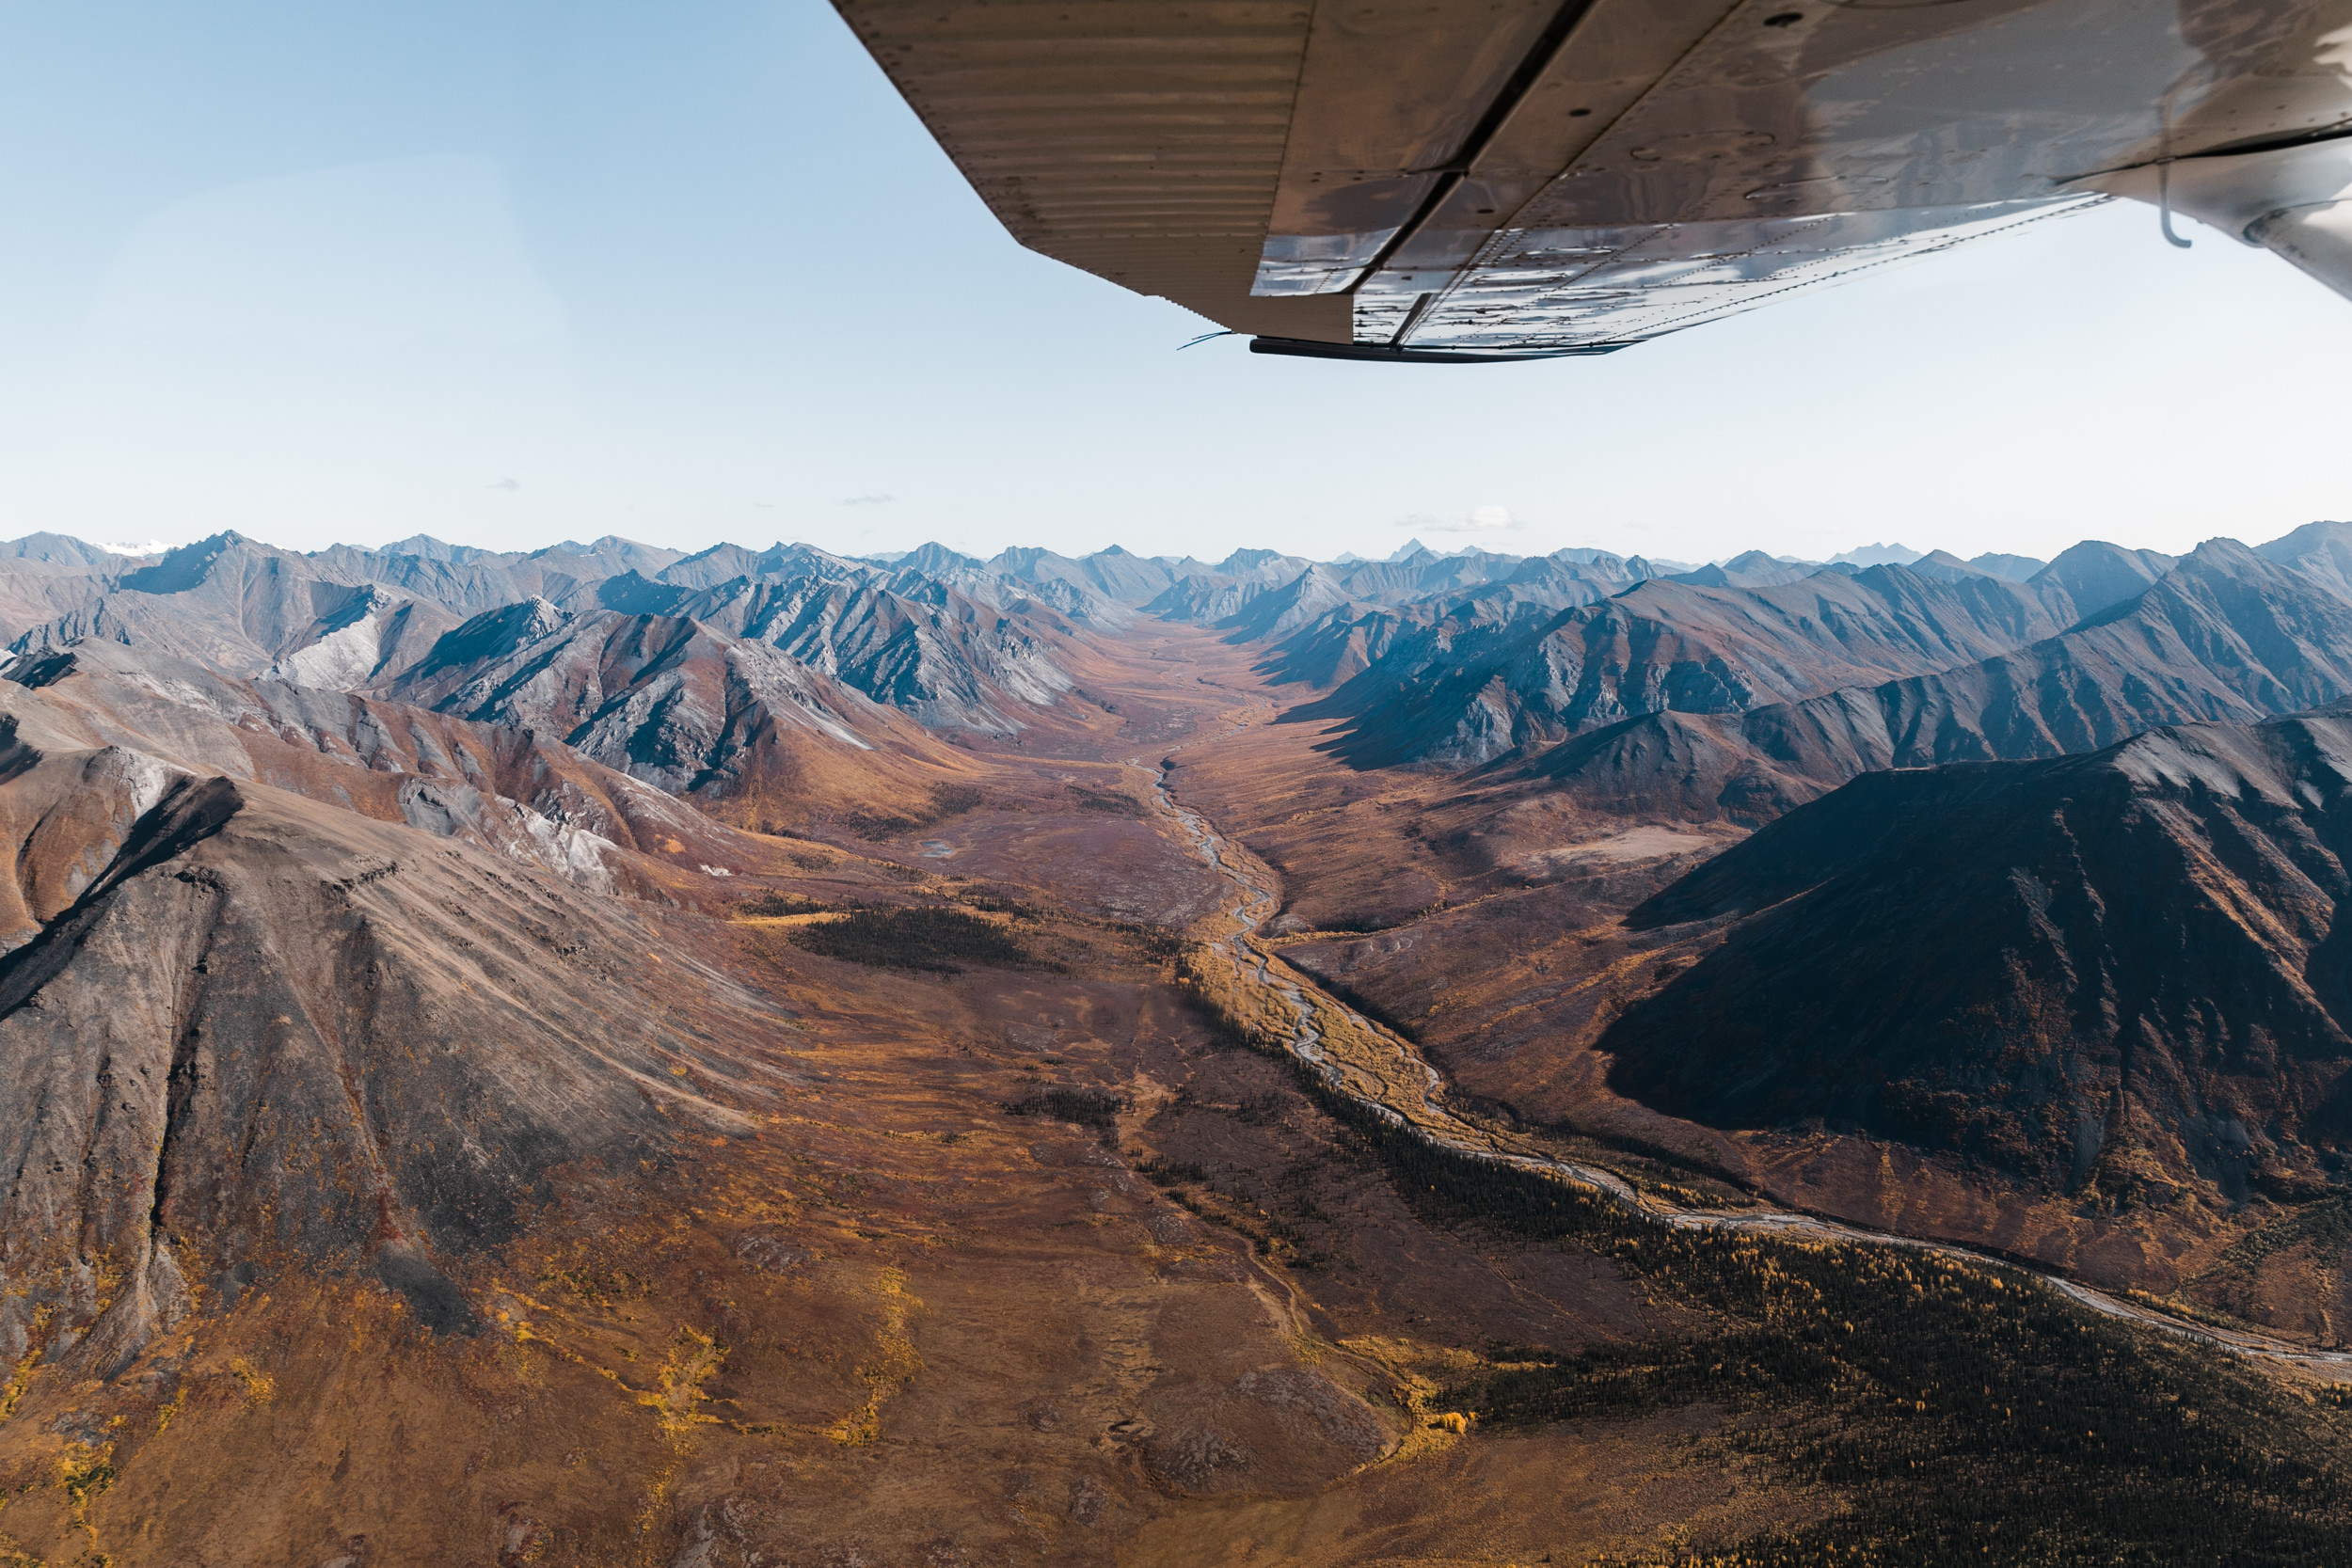
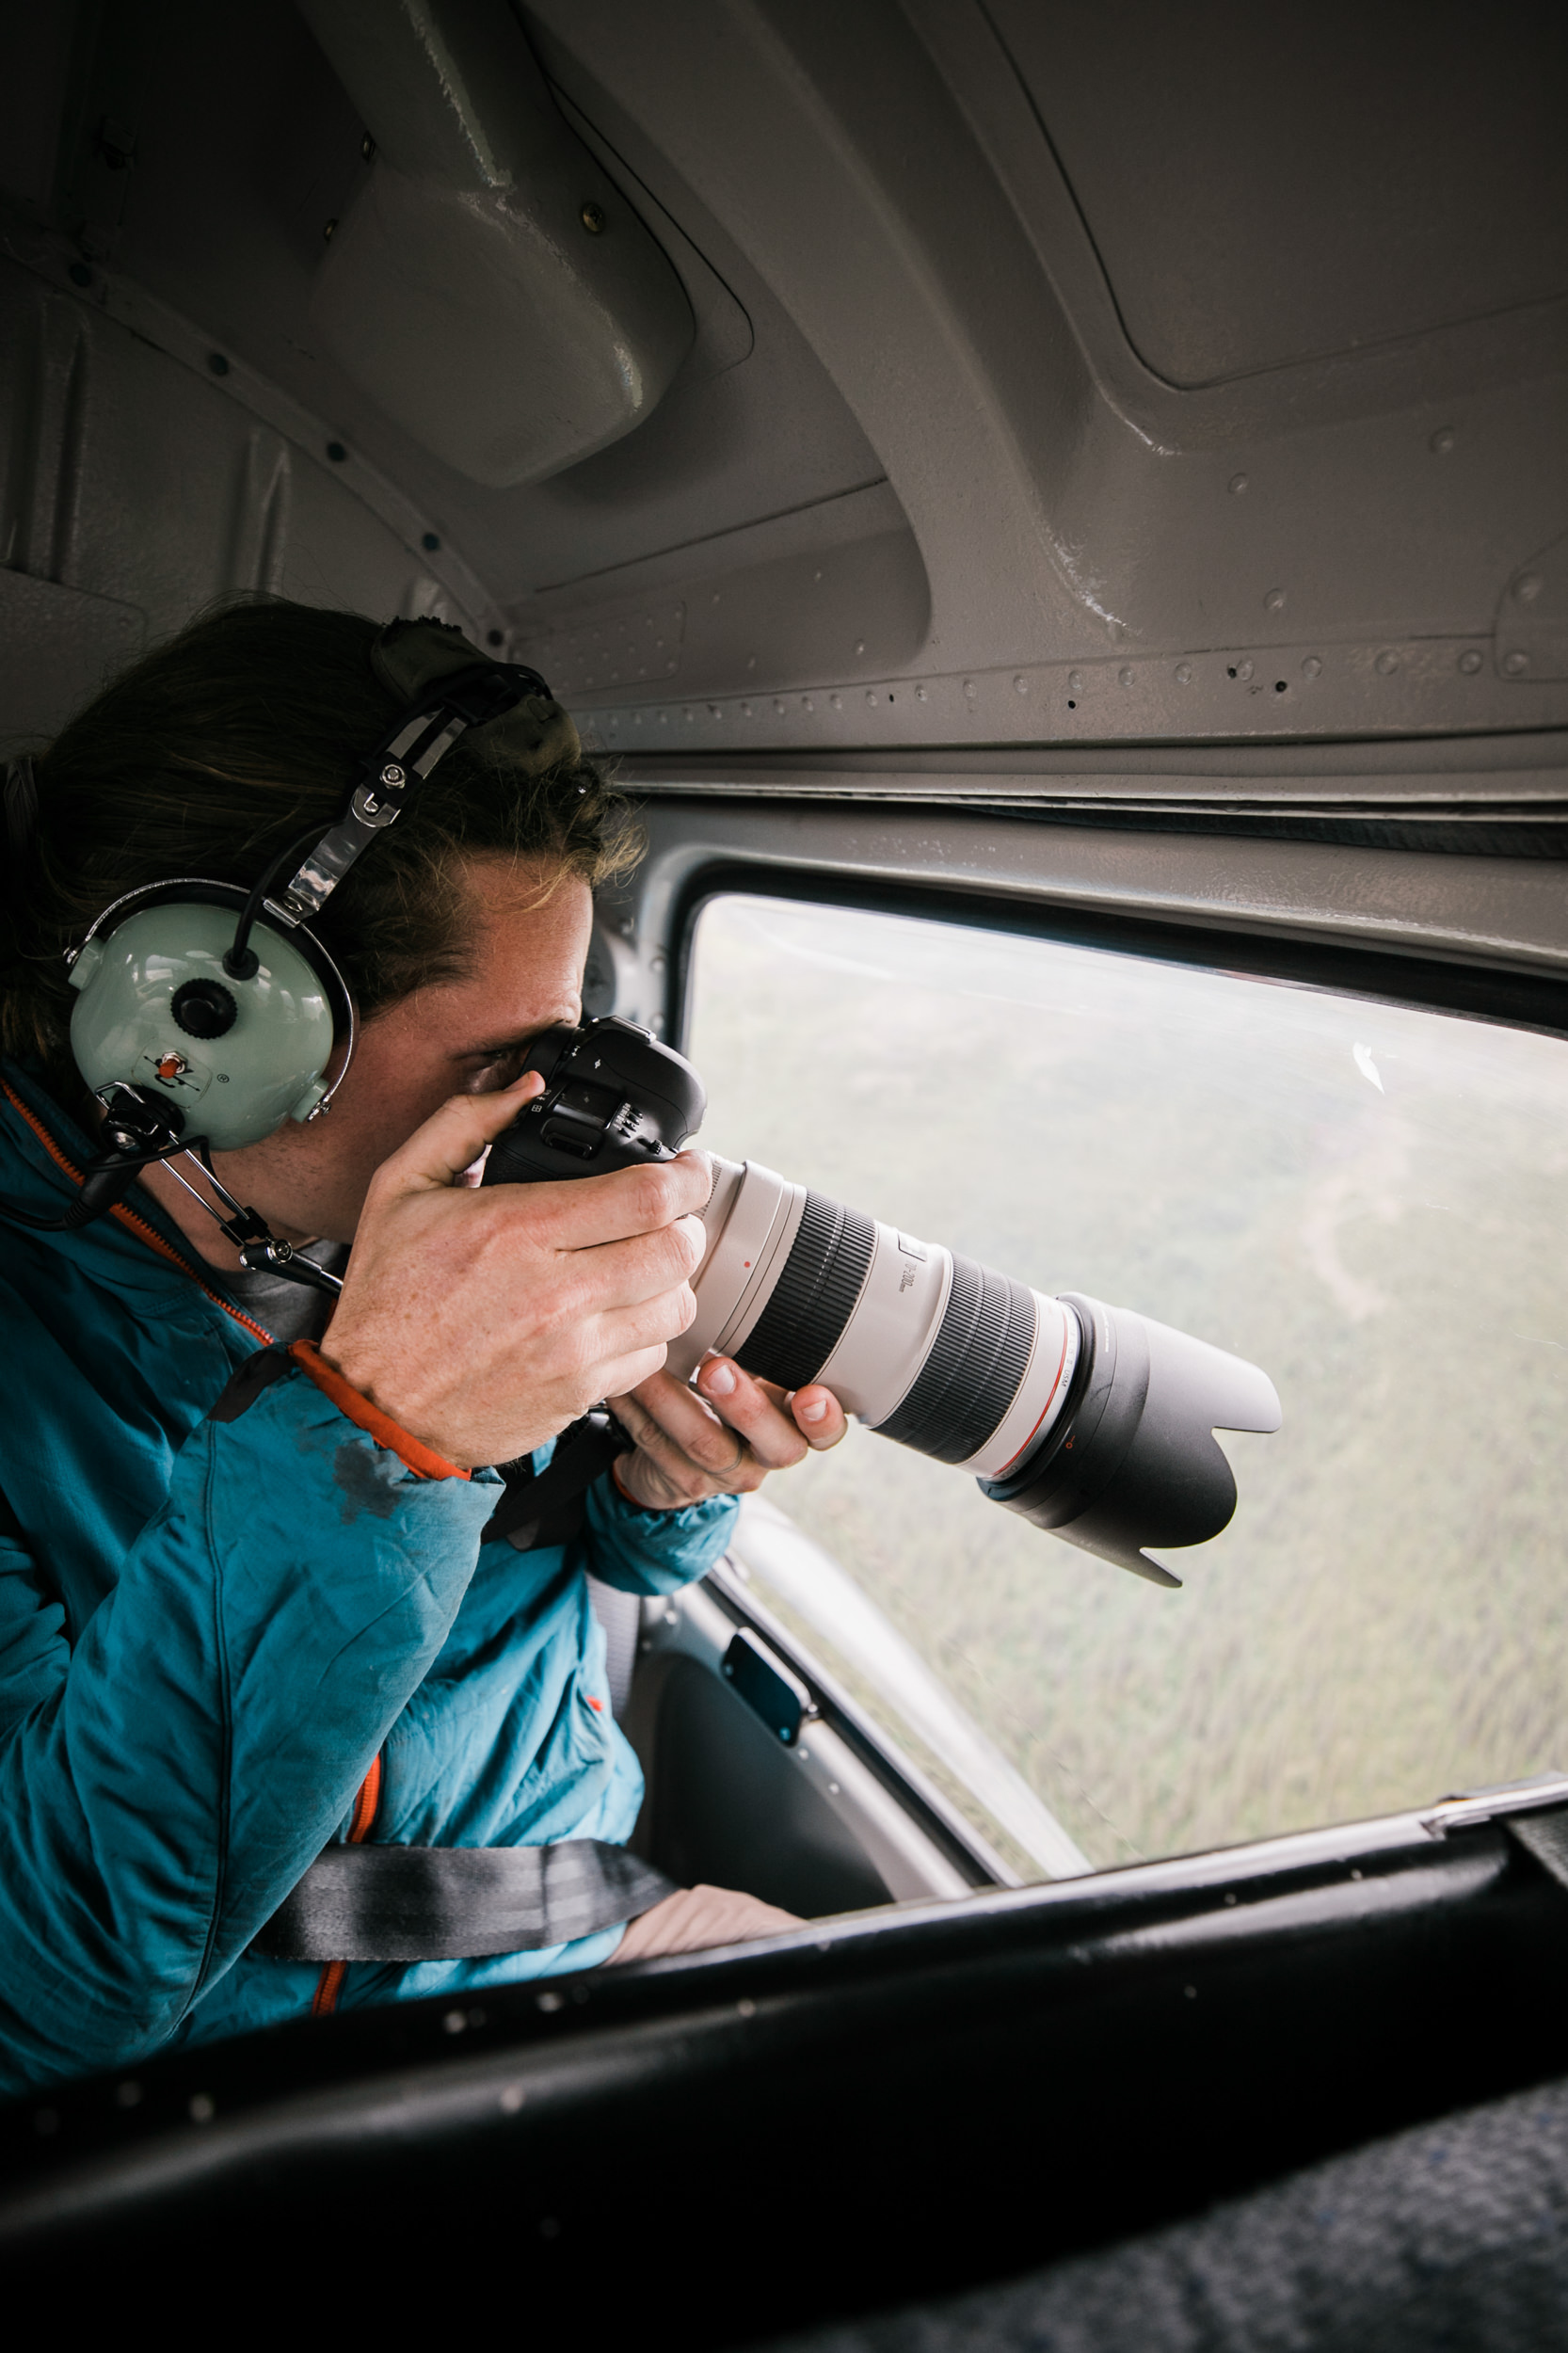
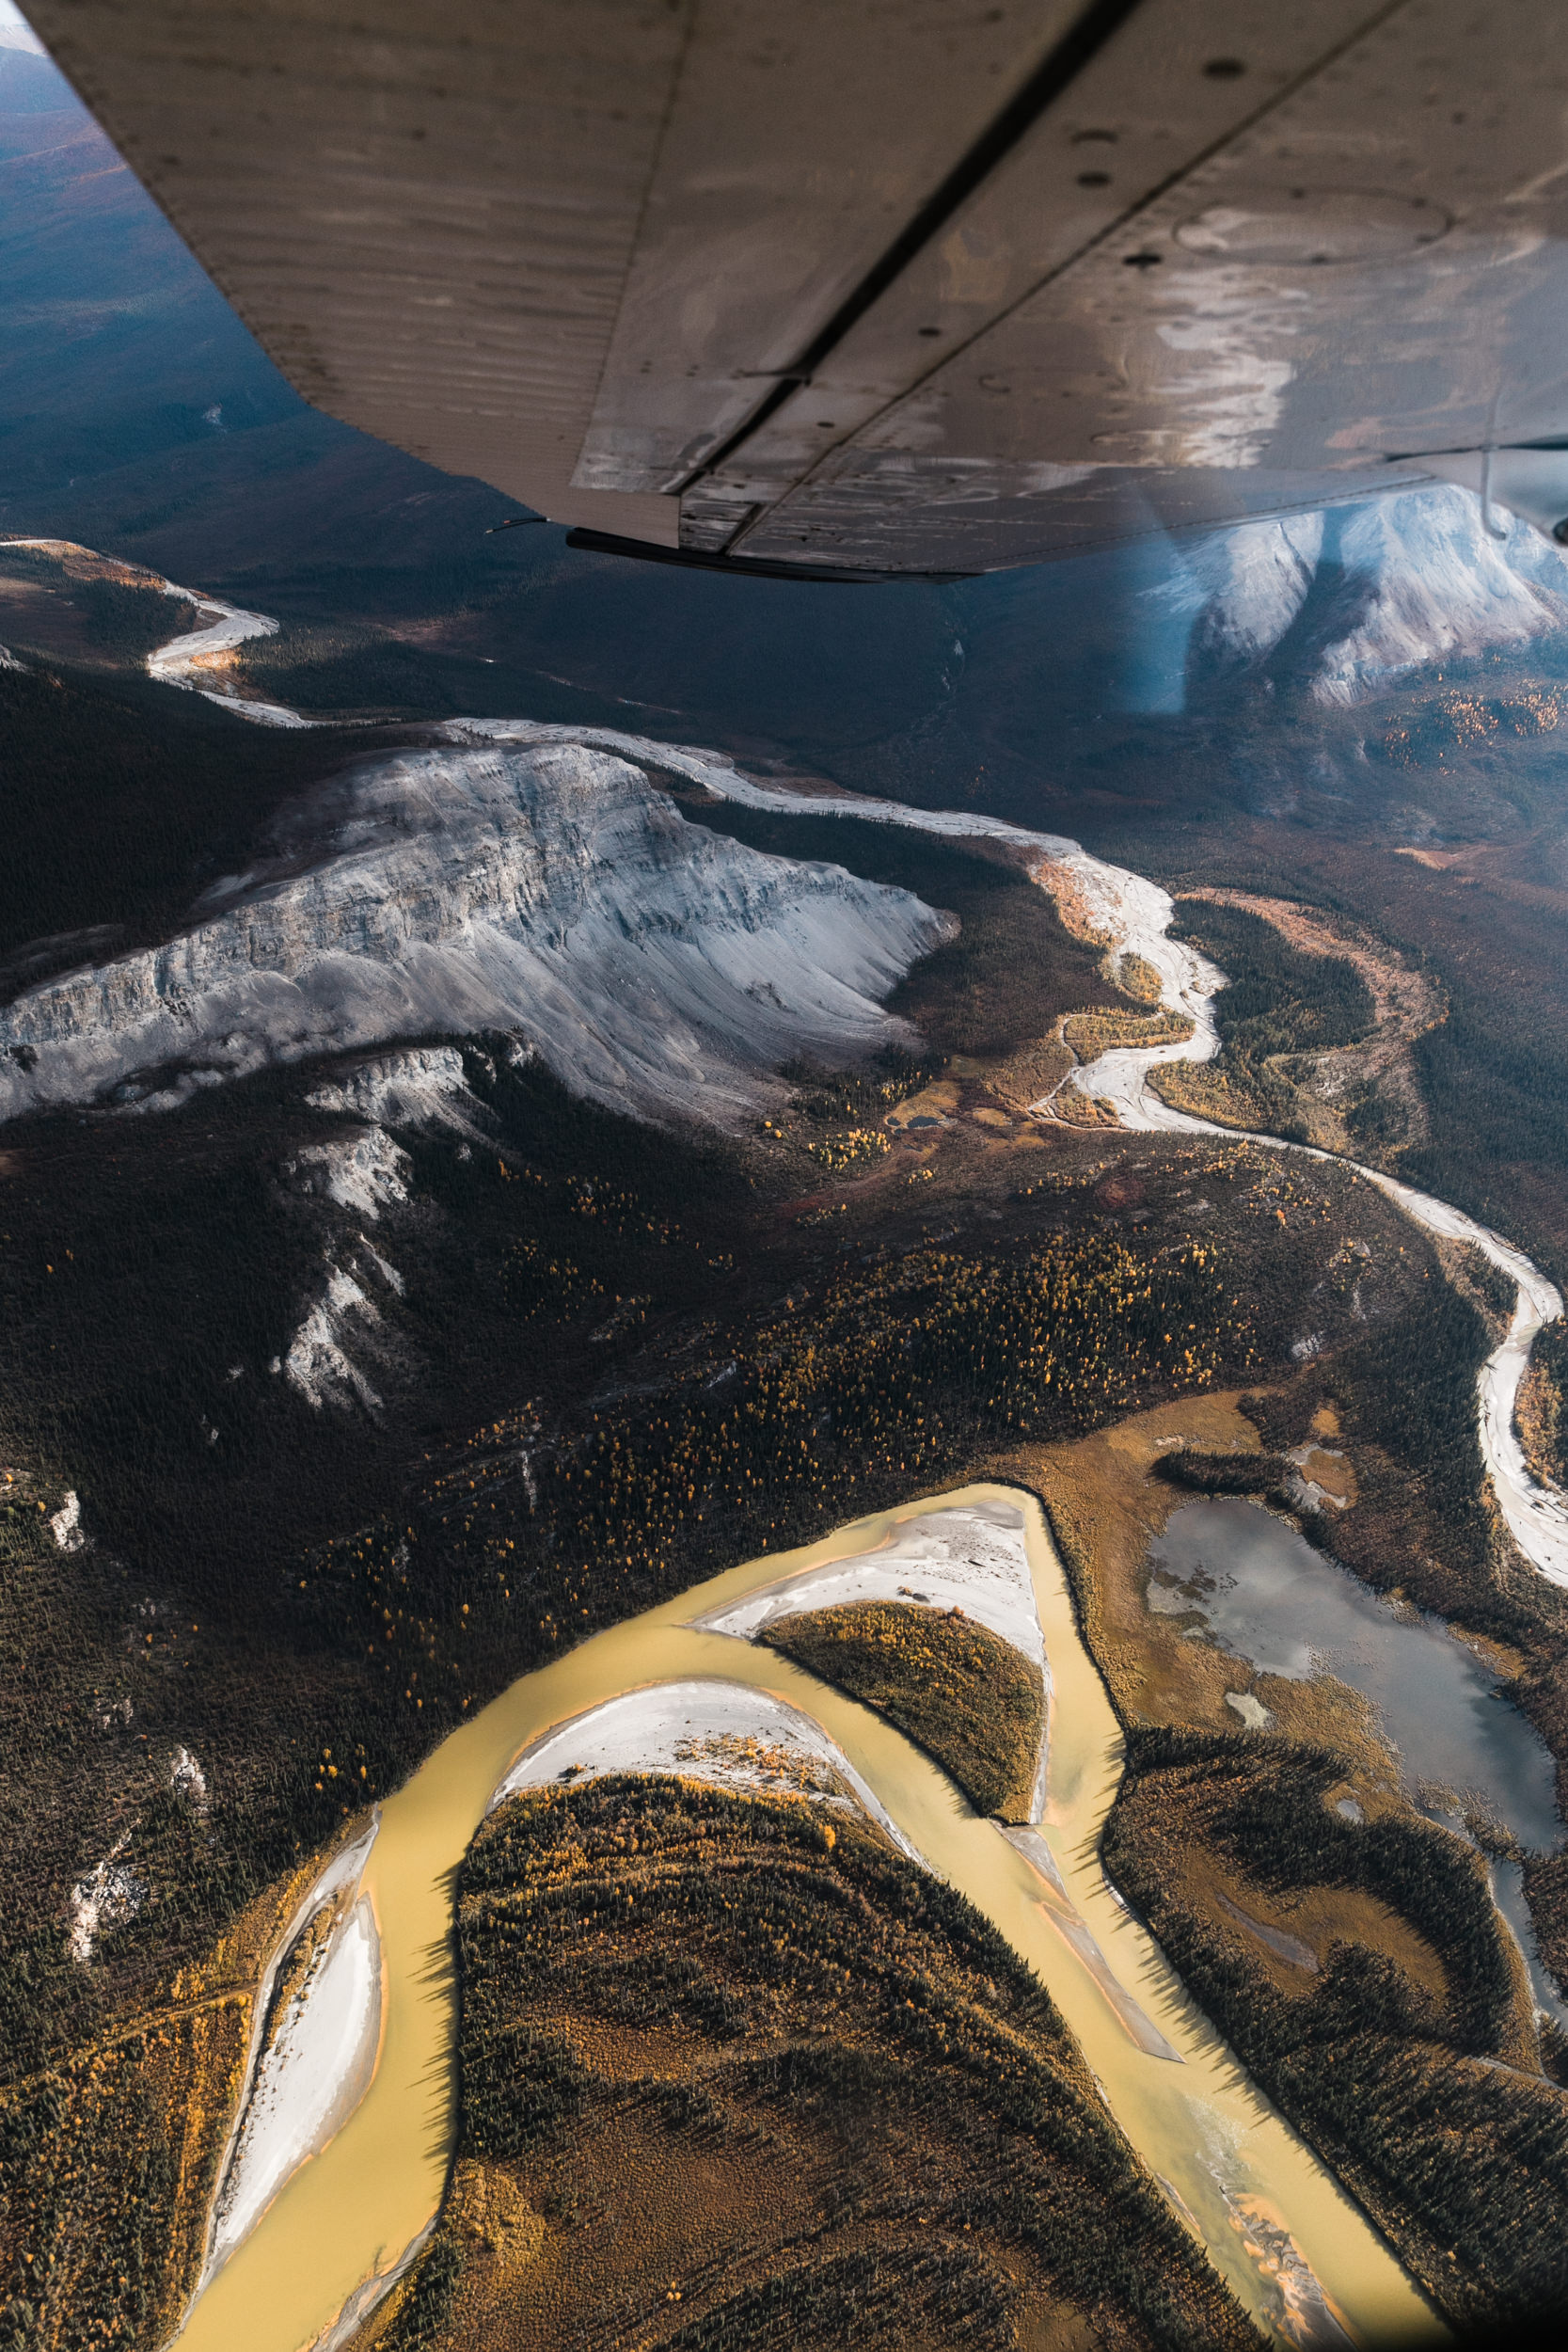
In a small plane, you don’t have as much maneuverability, so it’s more important to get the shot when you see it (going back is much harder). You’re also typically a bit more limited with framing because planes usually have smaller windows, and the wings/wheels will be in the frame if you’re super wide. For instance, we flew over Gates of the Arctic National Park in a Cessna 204 (4-seater), and when I was shooting at 24mm, the wing and/or wheel would be in the frame. While I enjoy this for some photos, I also like to be able to frame without it, so the 24-70 was more suited for the airplane. I also liked to be able to zoom in when passing something interesting, since the plane can’t easily change course and get closer to something to it’s right or left. I also like that the 24 is wide enough to get a few photos inside the plane, like one Callen took of Charlie and I over his shoulder (I handed him my camera)!
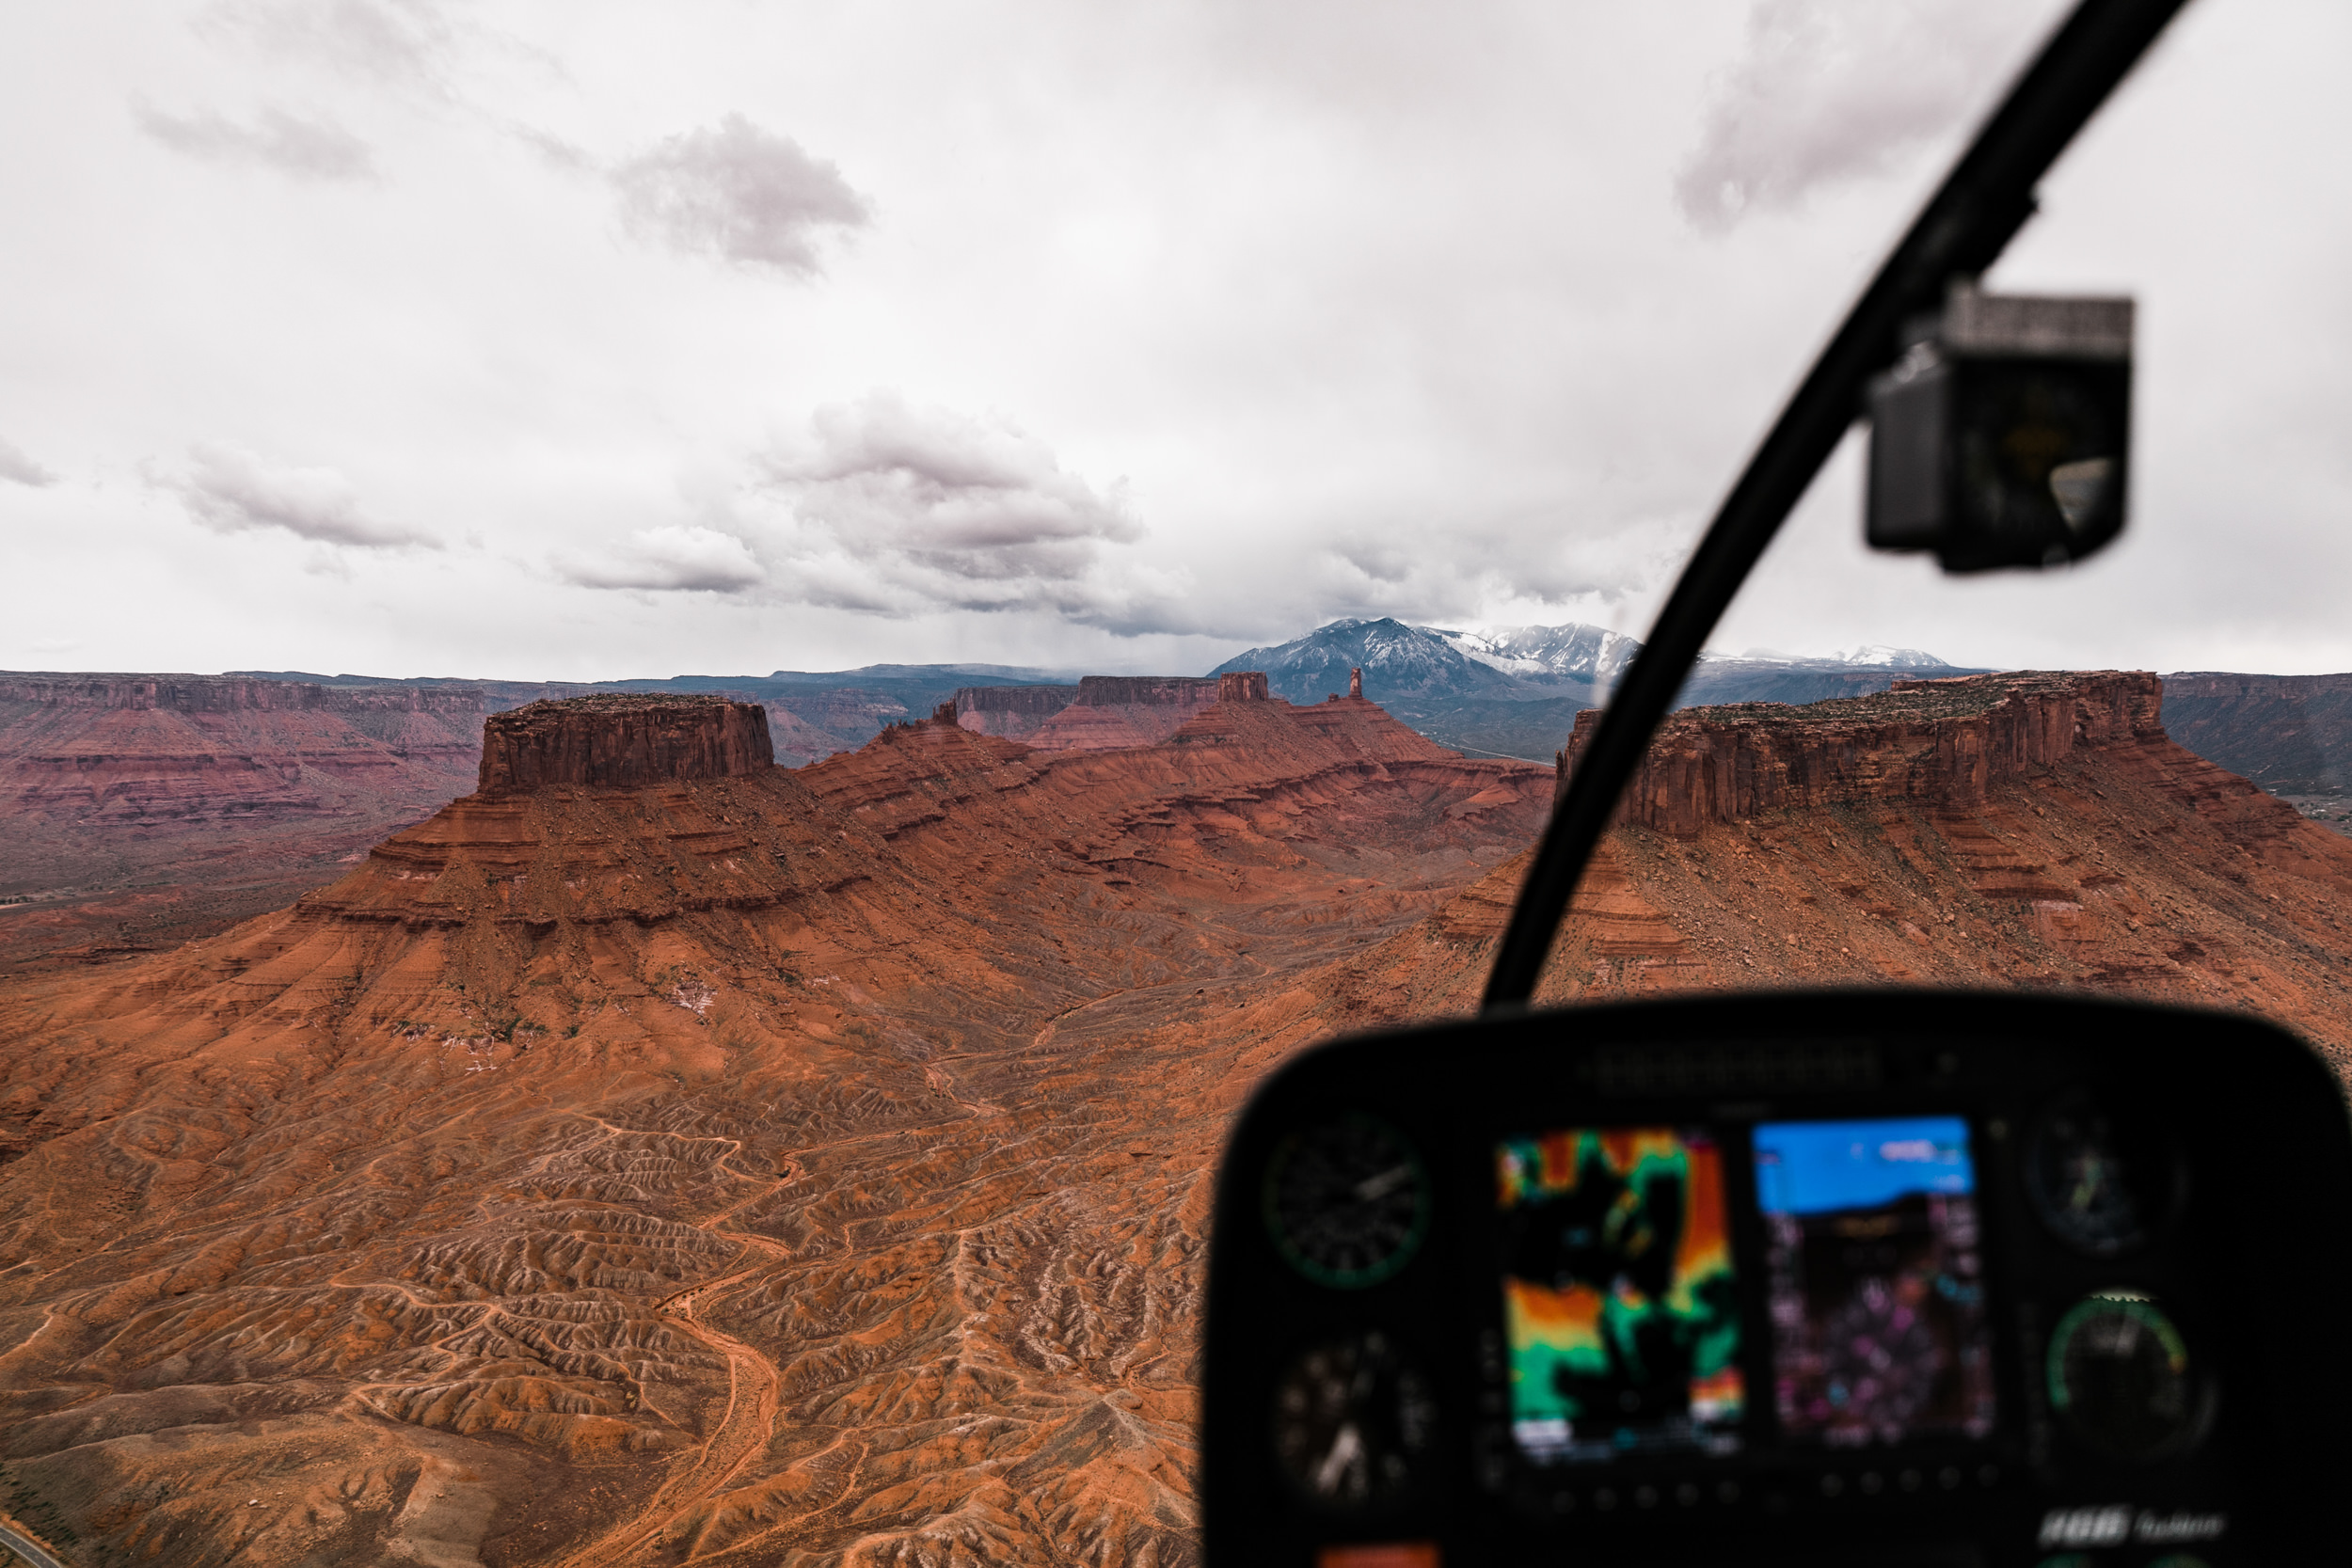
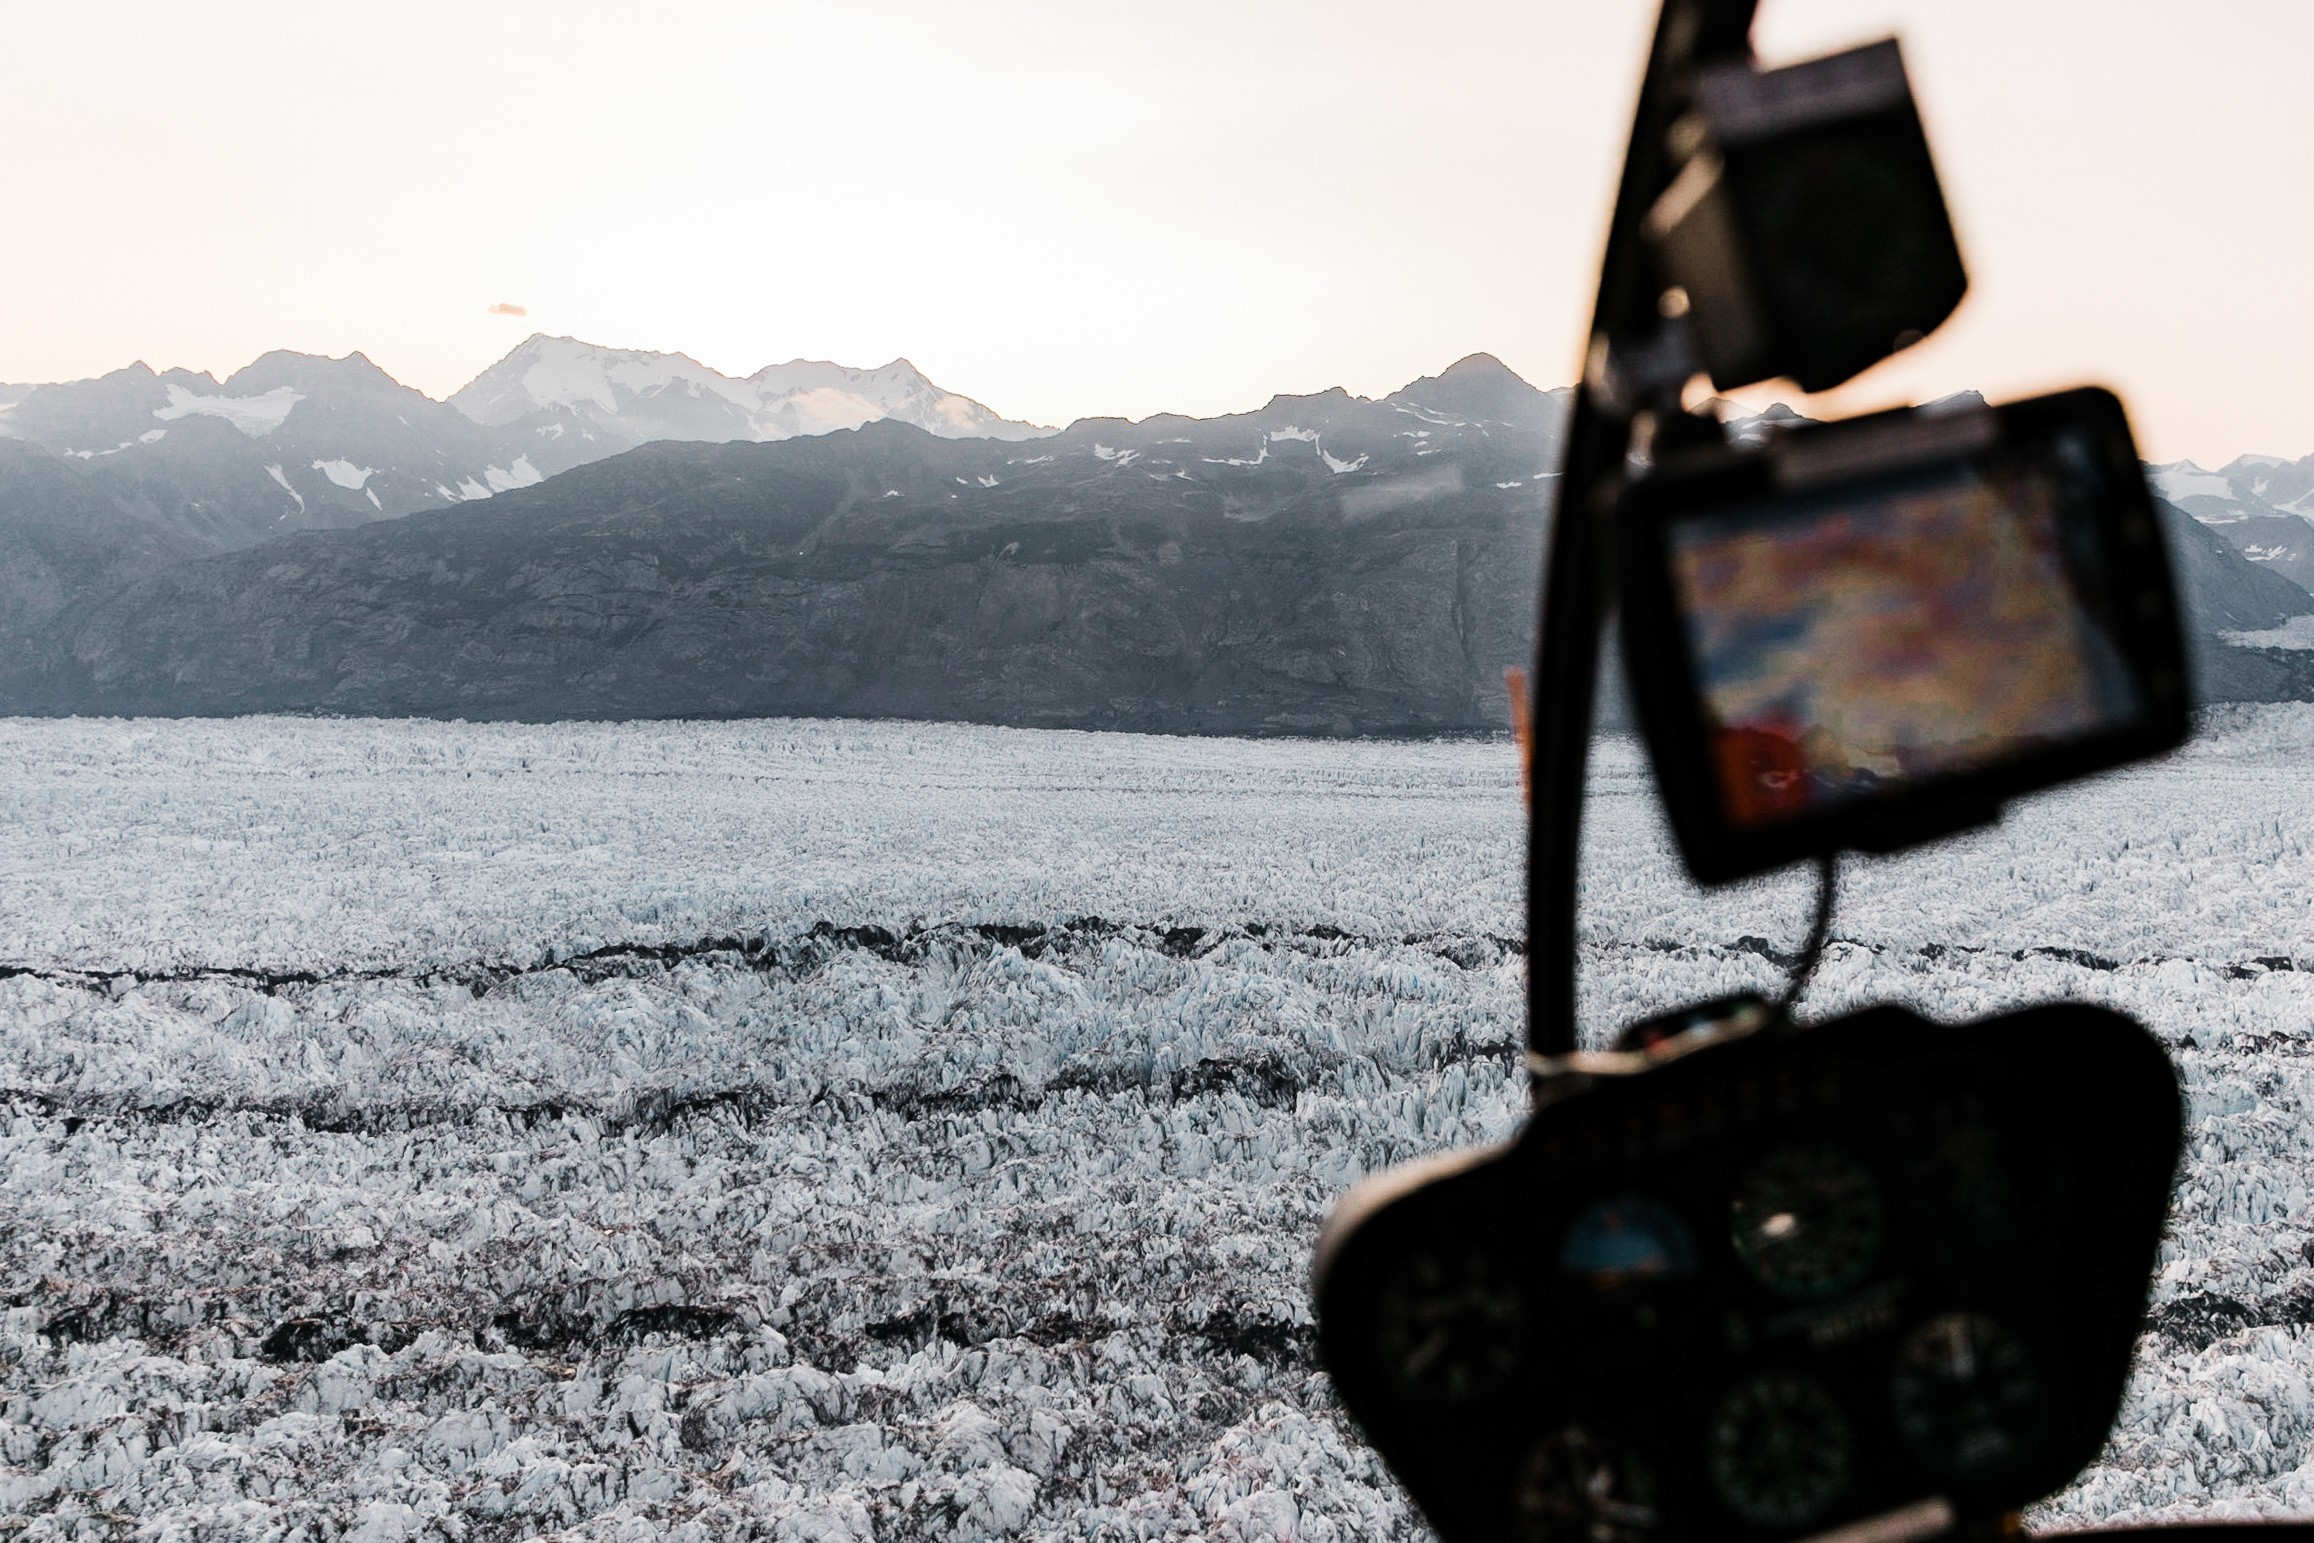
When shooting photos from a helicopter, I tend to prefer the 16-35 2.8L for a few reasons. For one, if you’re sitting in the front seat of the helicopter, the front windows typically go down to your feet, so you have a lot of visibility. With the 16-35, you can capture super wide landscapes and the rotor only shows up in photos sometimes since it’s always rotating (if it does, it’s super easy to edit out). I’ve also found that helicopters can get much closer to objects and the ground, so the 16-35 can be great for “close ups” of the landscape if you’re right by it, and the helicopter can go forward, side-to-side, or backwards, so you have a few opportunities to get the shot you want if your pilot is willing to work with you! I will note, I have shot with both a 24-70 and a 16-35 in a helicopter, and I honestly go back and forth on which one I prefer. It varies by landscape, by how much the pilot is willing/able to work with me (for instance, if the flight is for a couples shoot, we’ll just be cruising over there and not prioritizing landscape photos, so I wouldn’t ask to move around for the right shot), and whether or not I want photos in the helicopter (they’re smaller, so the 16 is necessary for a photo of the people sitting behind you, for instance).
Other gear I suggest having on hand is an extra battery and card that you can reach easily, gloves (I have these fingerless/mitten Patagonia gloves that I love), and sunglasses. Keep in mind when you are loading up that it will be difficult to adjust, get into pockets, etc once you’re seat belted in. Especially in the front seat of a helicopter where you’ll have a 5-point seat belt, make sure you don’t buckle it over your camera strap and make it difficult to move your camera around! I also reccomend putting your hair up if you have long hair (one less thing to worry about), and if you’re prone to motion sickness pick up some non-drowsy dramamine. I take mine 30 minutes before the flight and it lasts all day. I always keep extra around for our couples too if they might need it!
Gear list:
Canon 5D Mark IV
24-70 2.8, 16-35 2.8, or 70-200 2.8 depending on the situation
Extra batteries and cards
Dramamine (anti-nausea, get the non-drowsy one!)
Small pack so everything is in one place
Gloves, sunglasses, and a jacket
Hair tie
Aerial Photography: Helicopters vs Planes
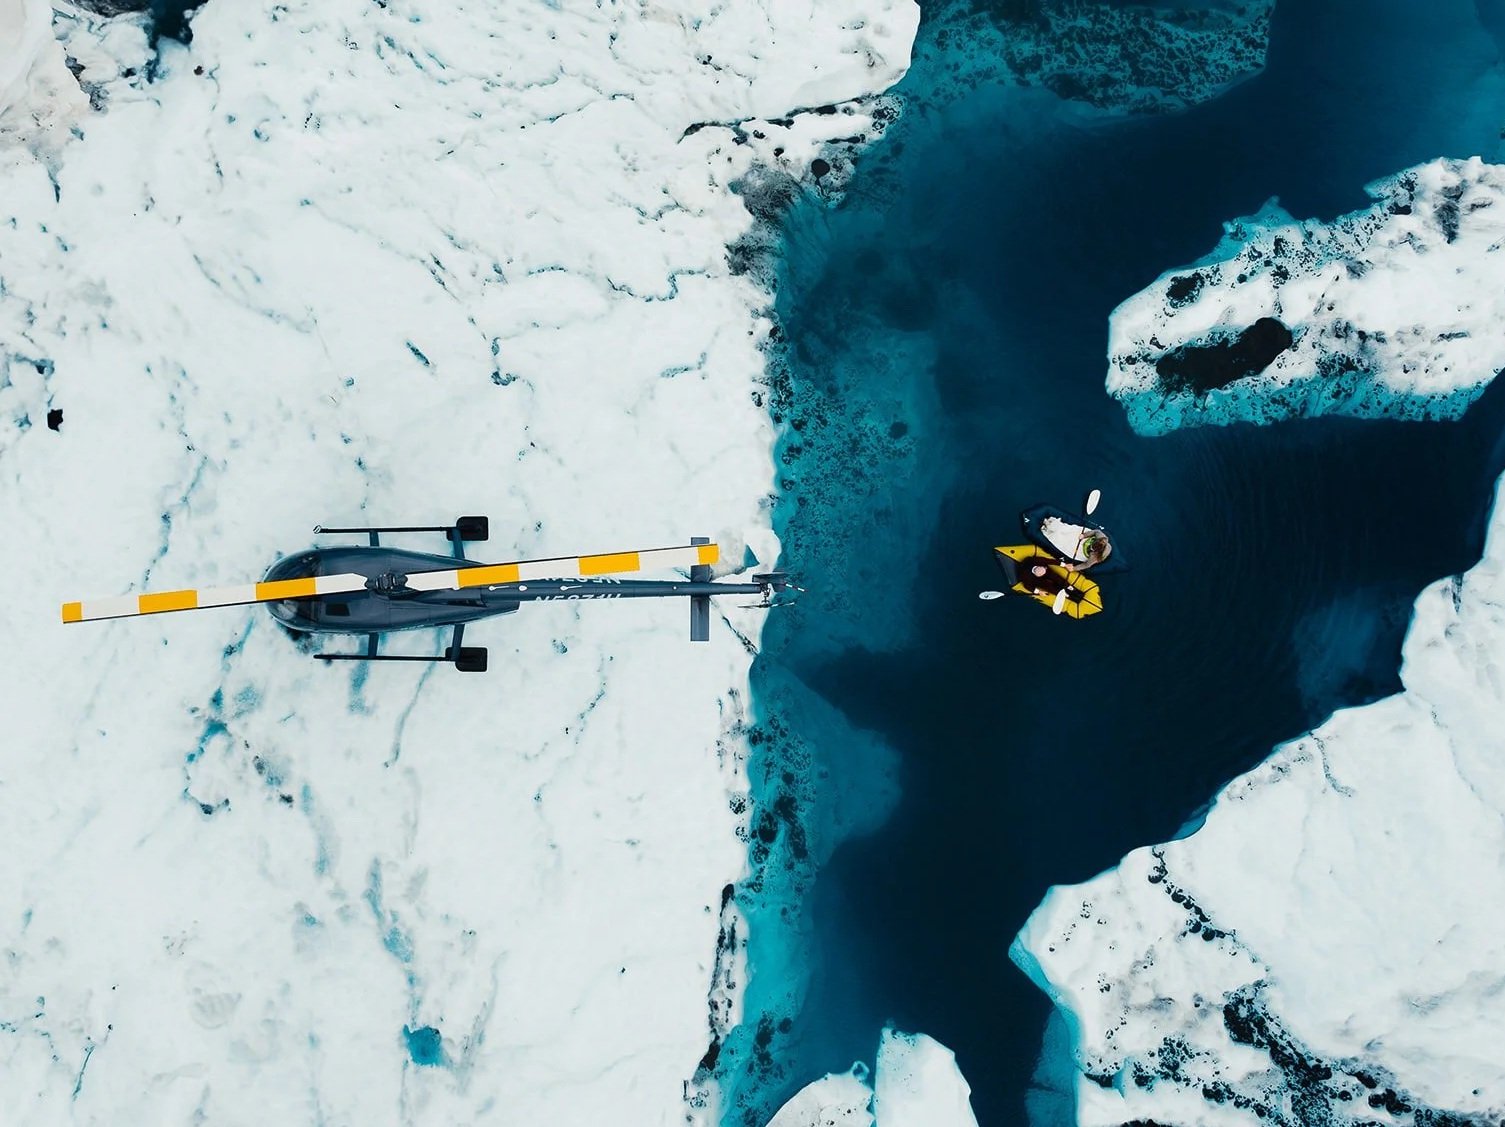
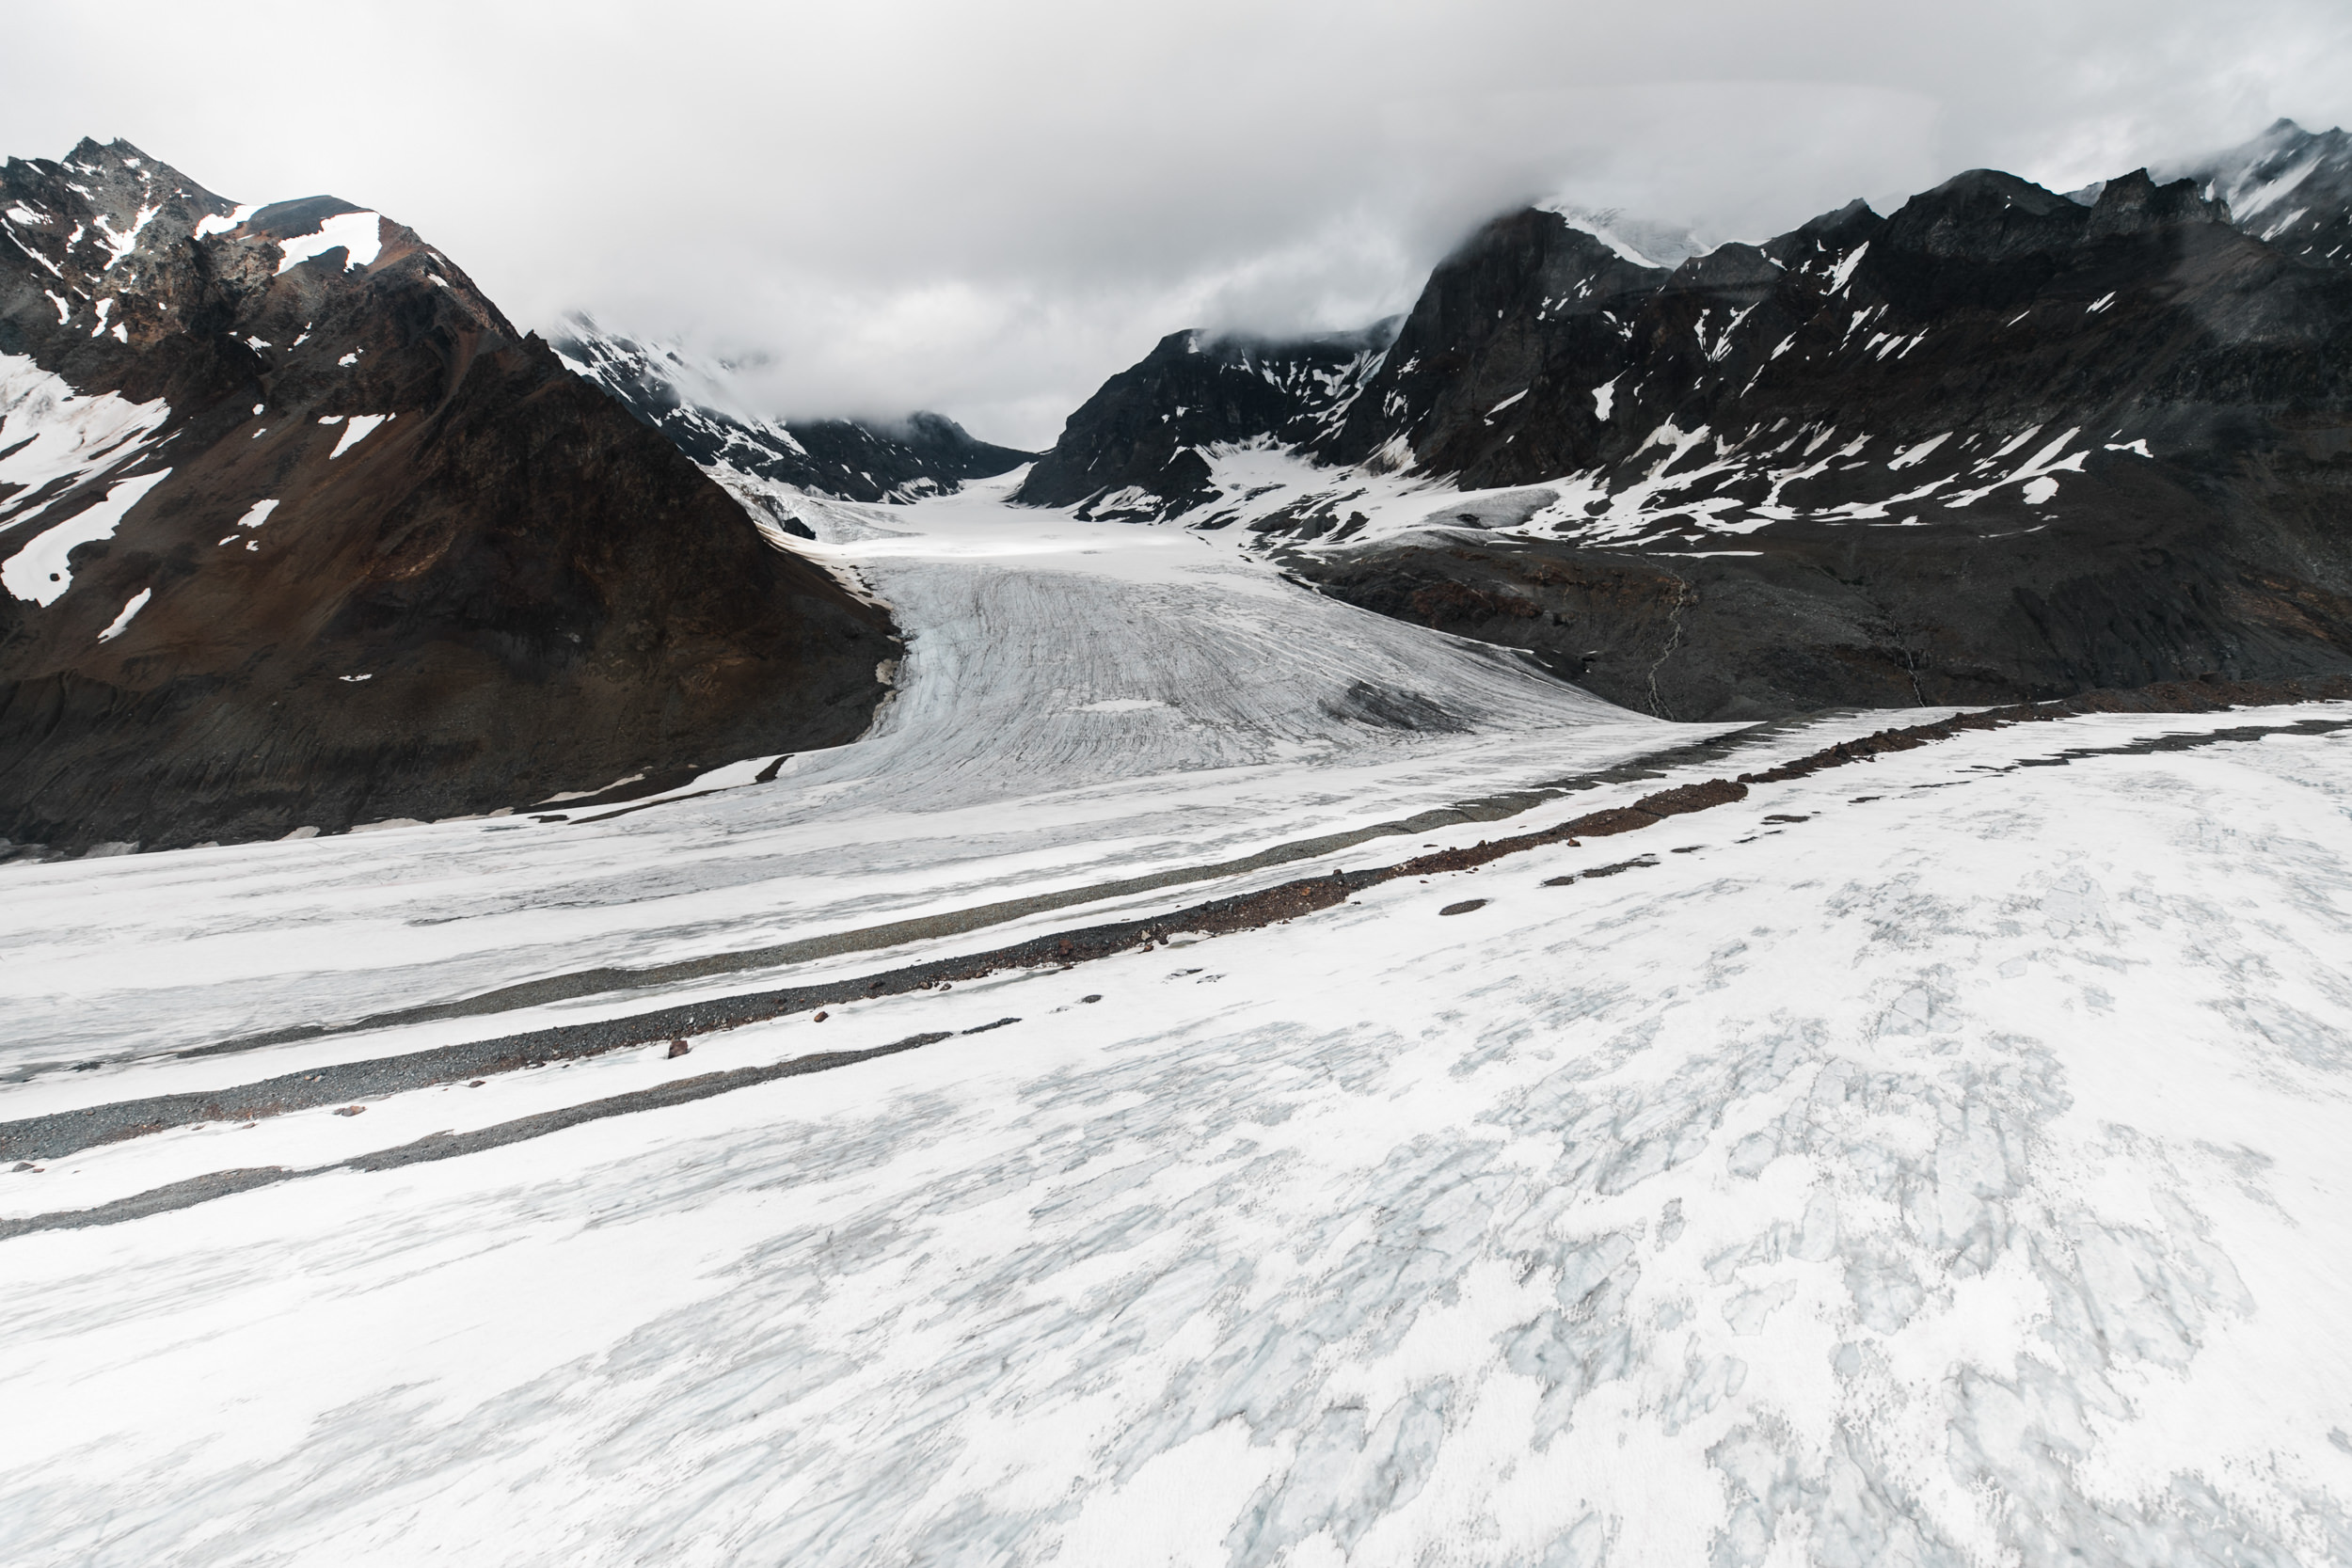
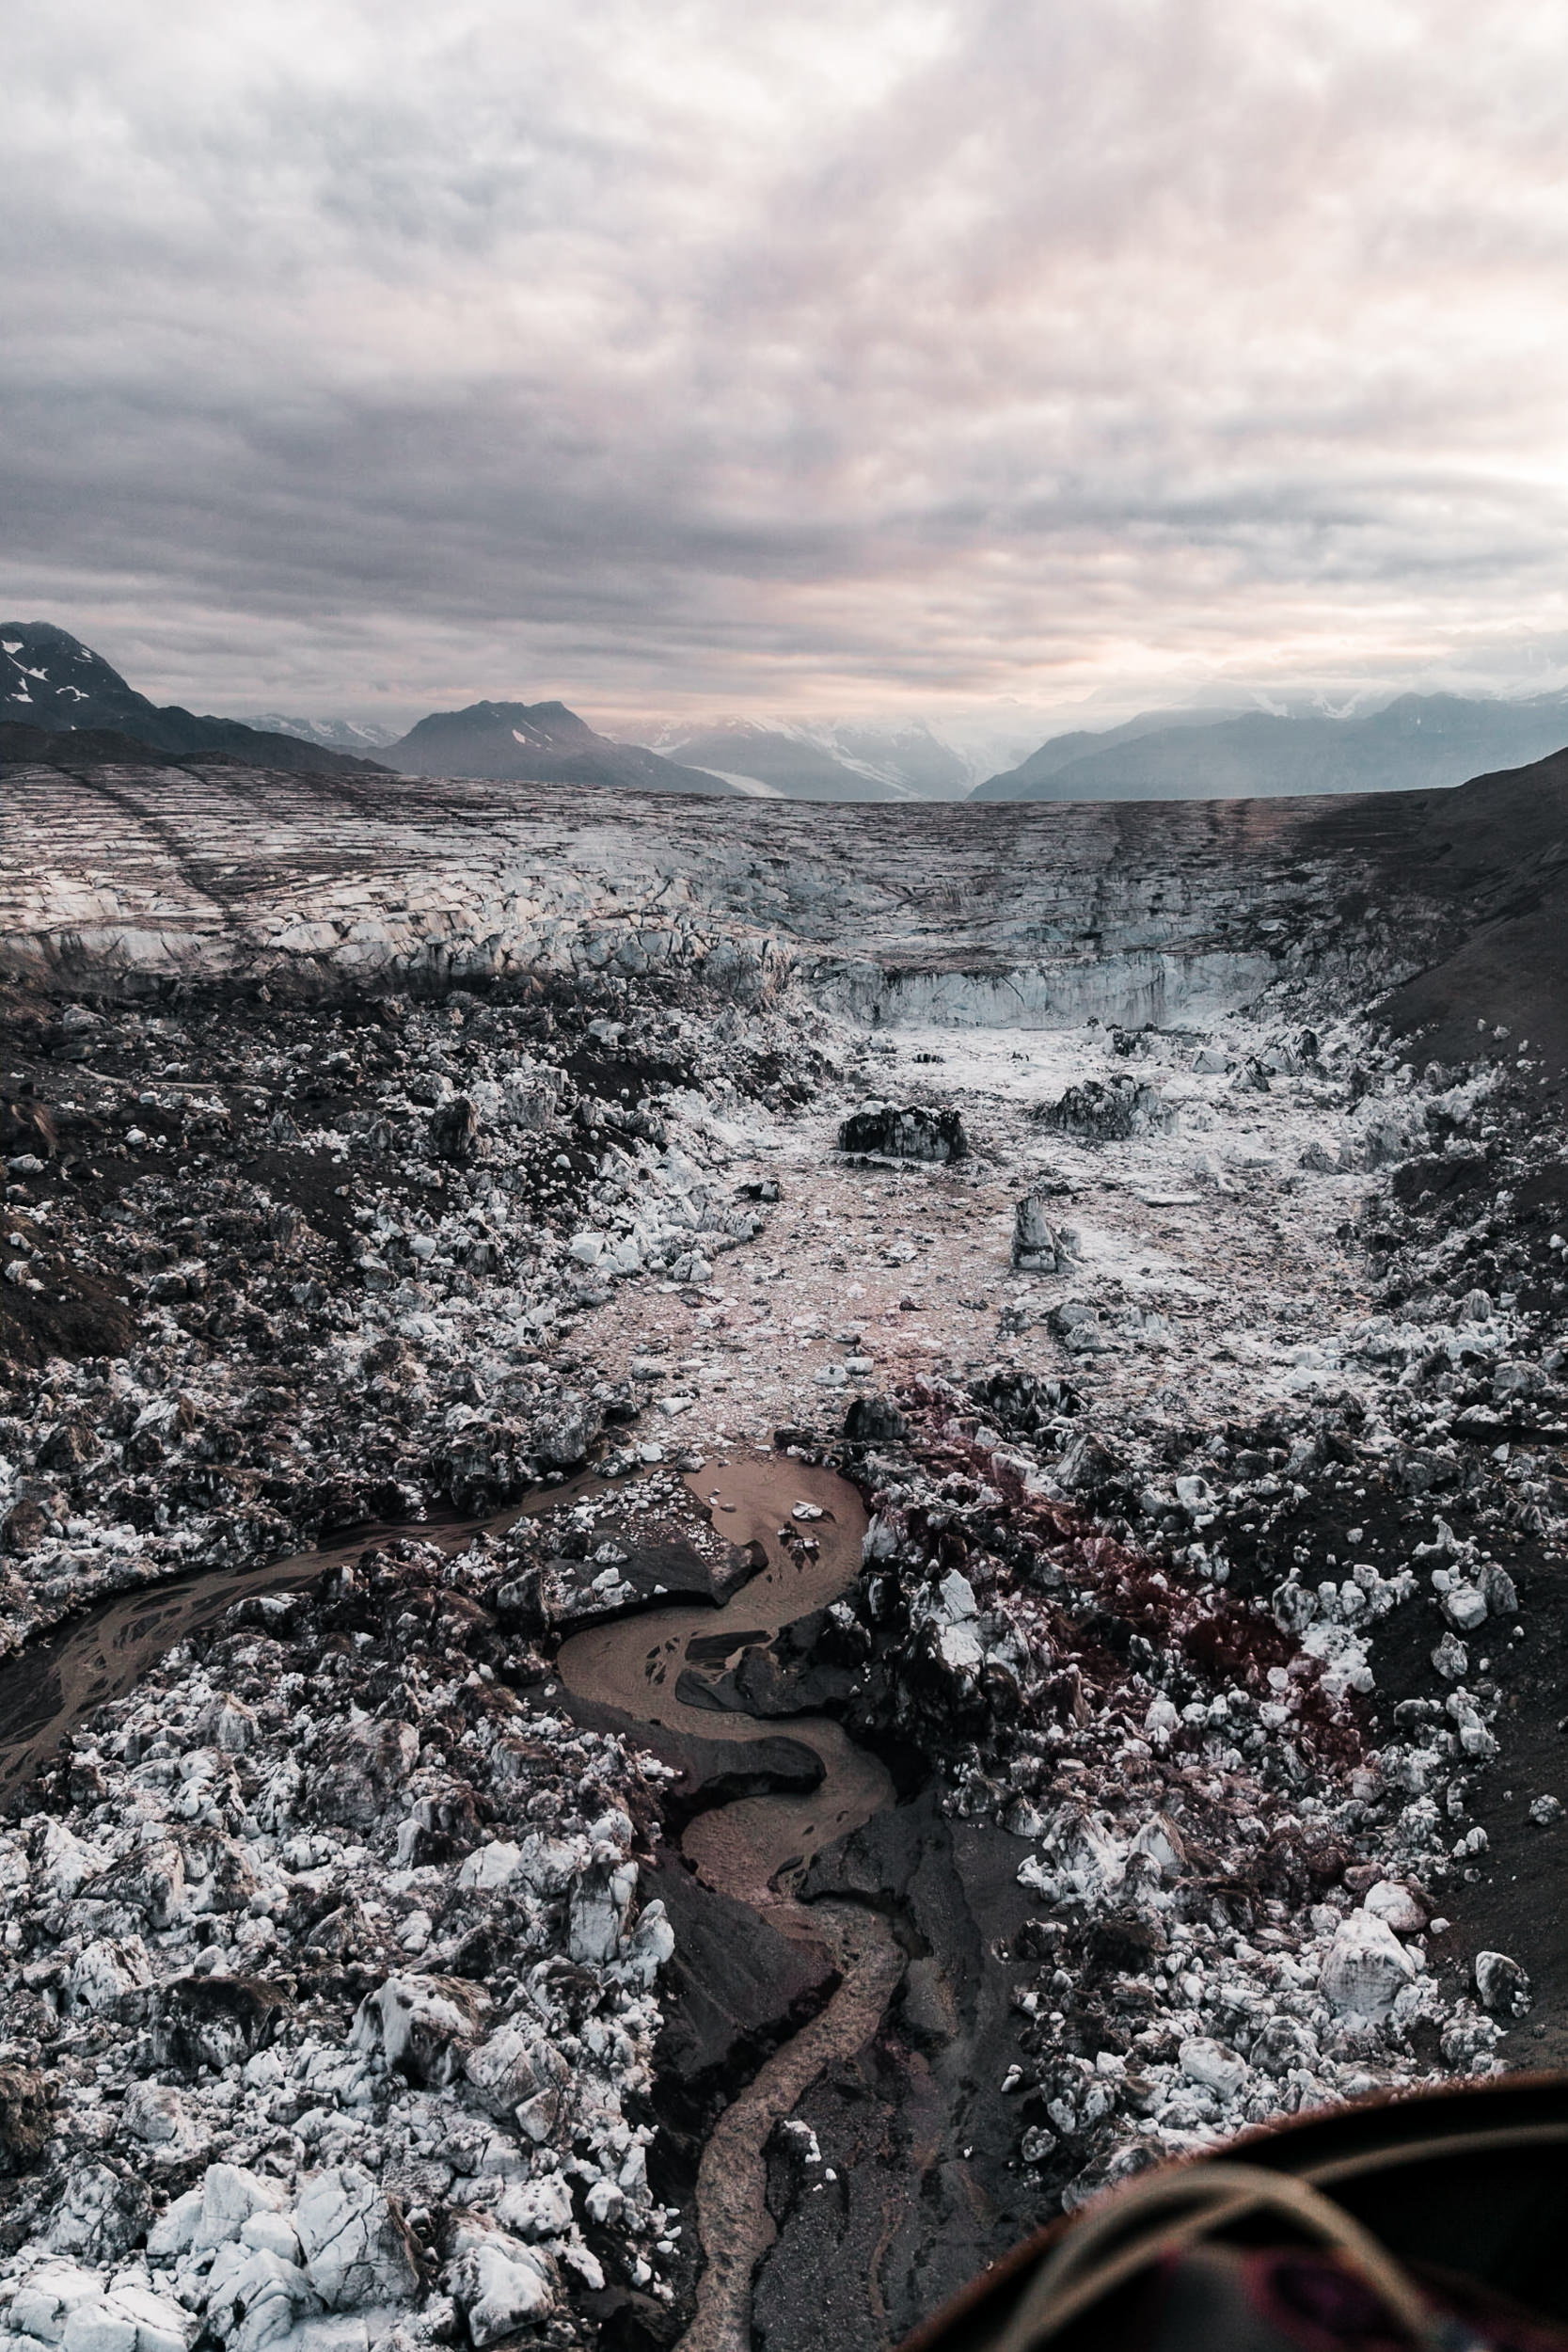
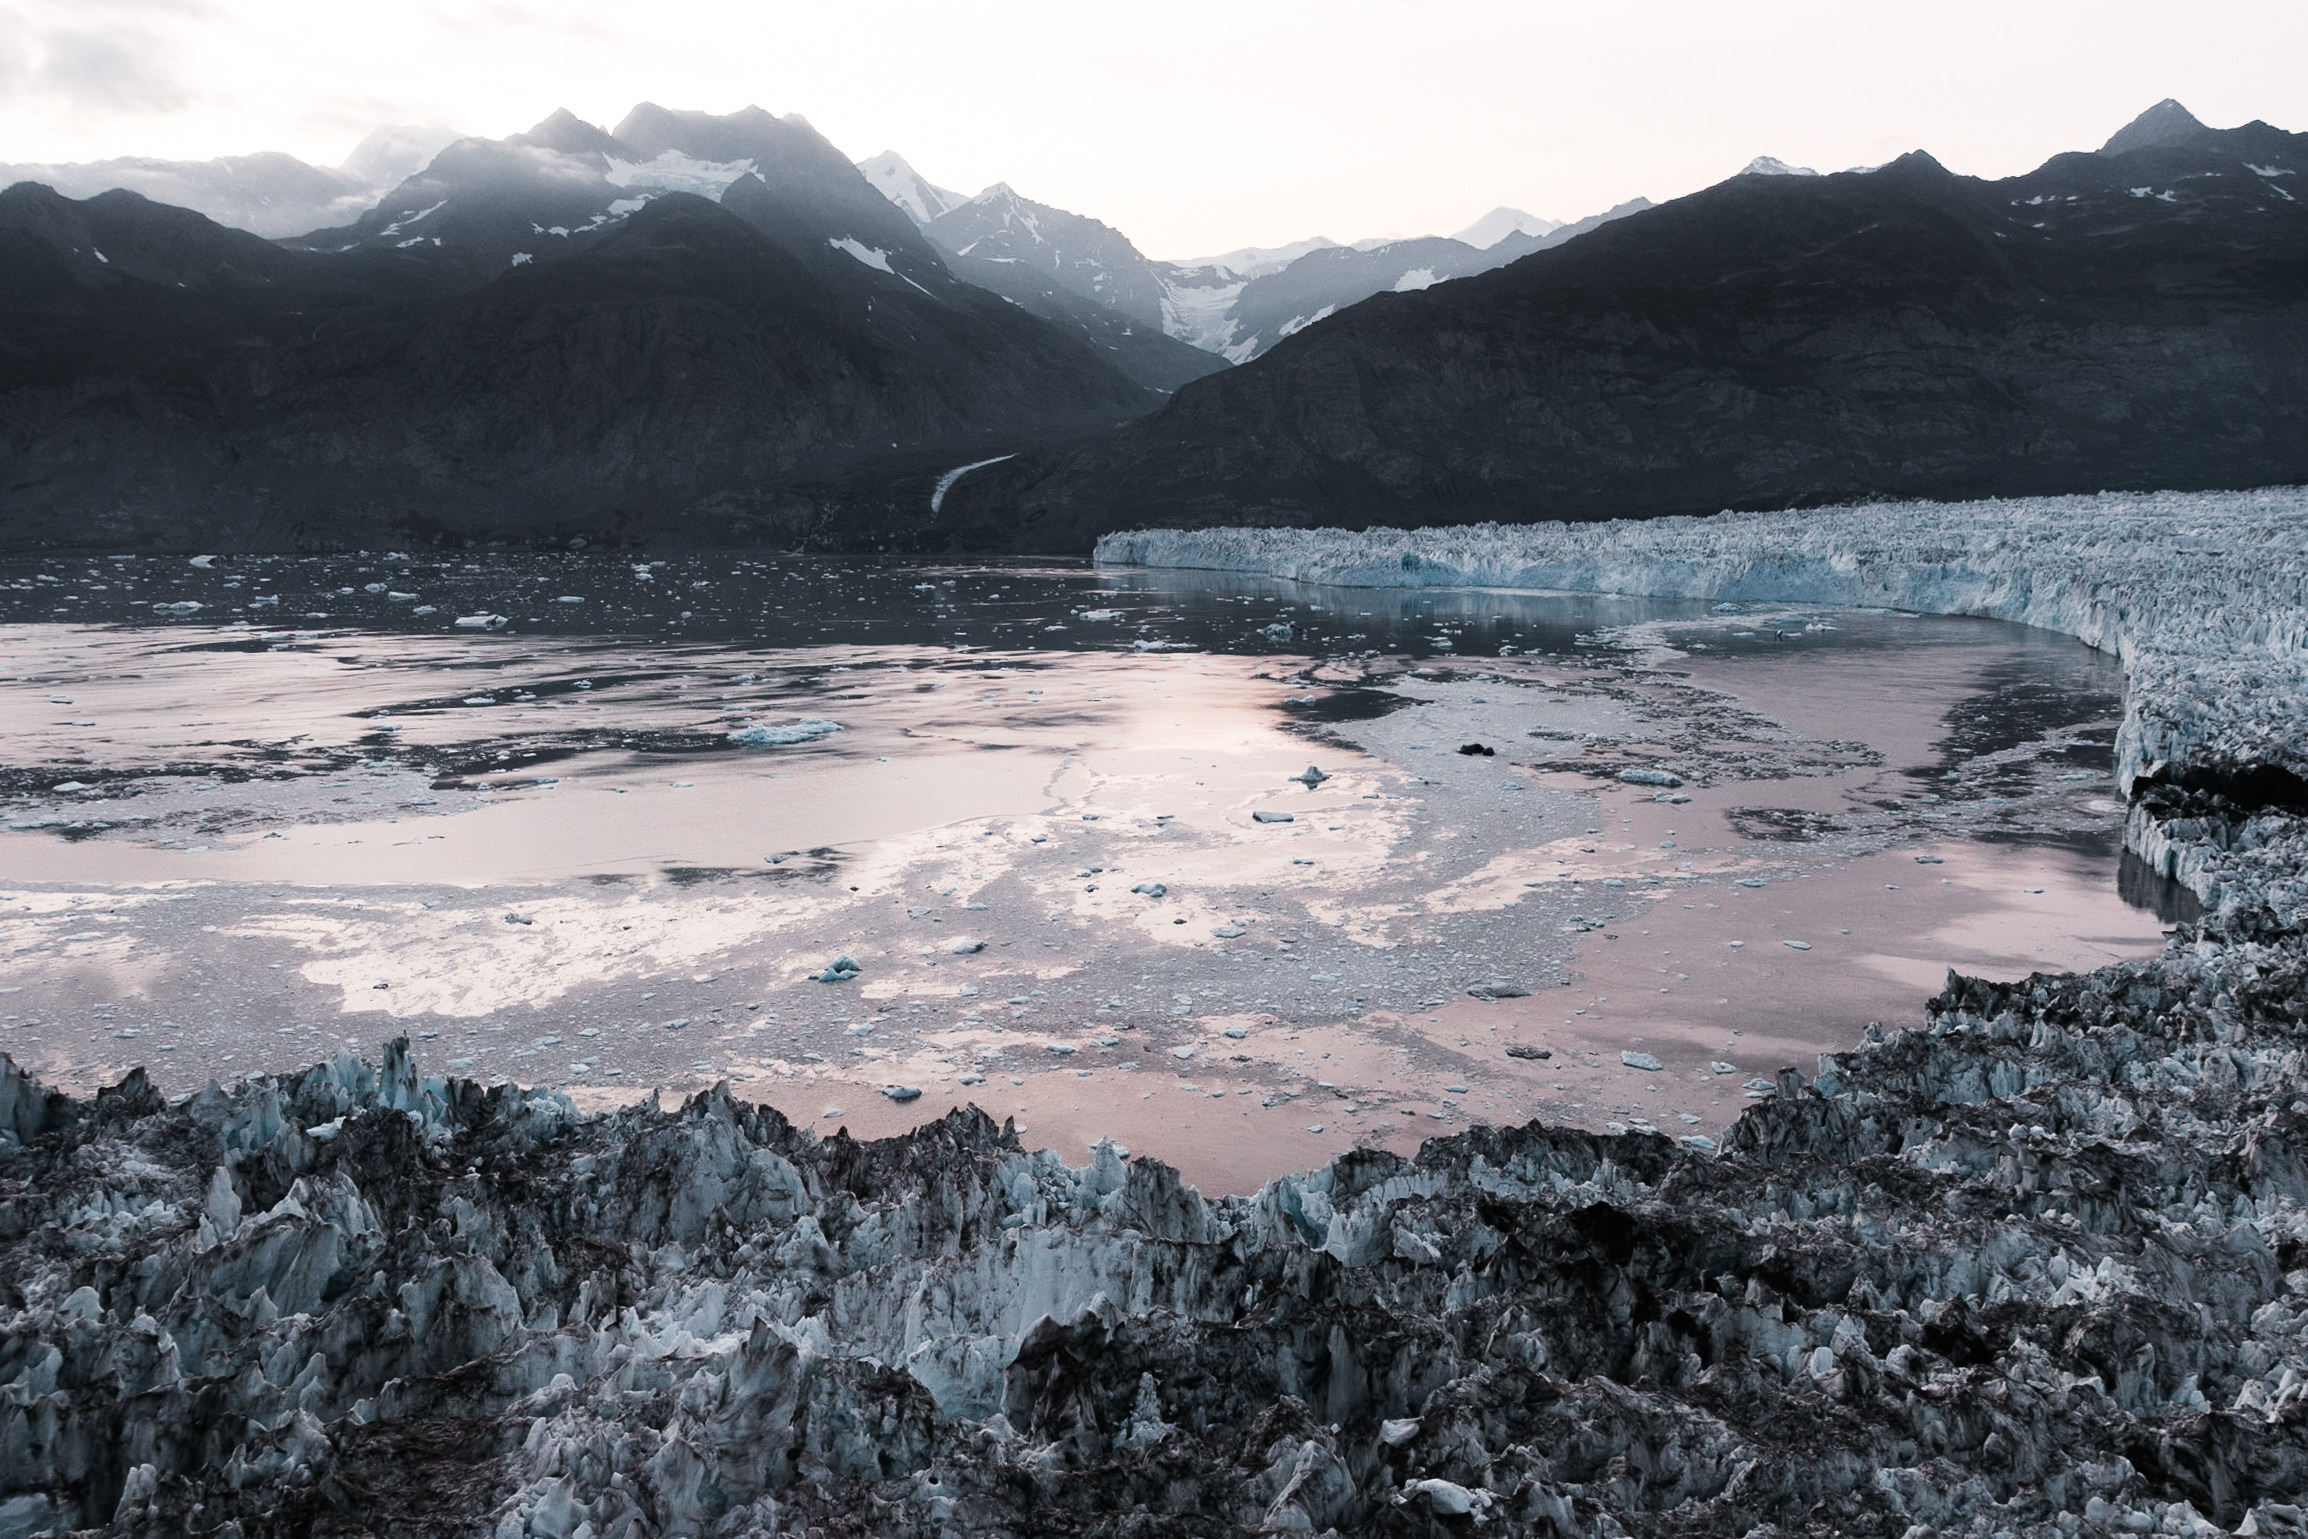
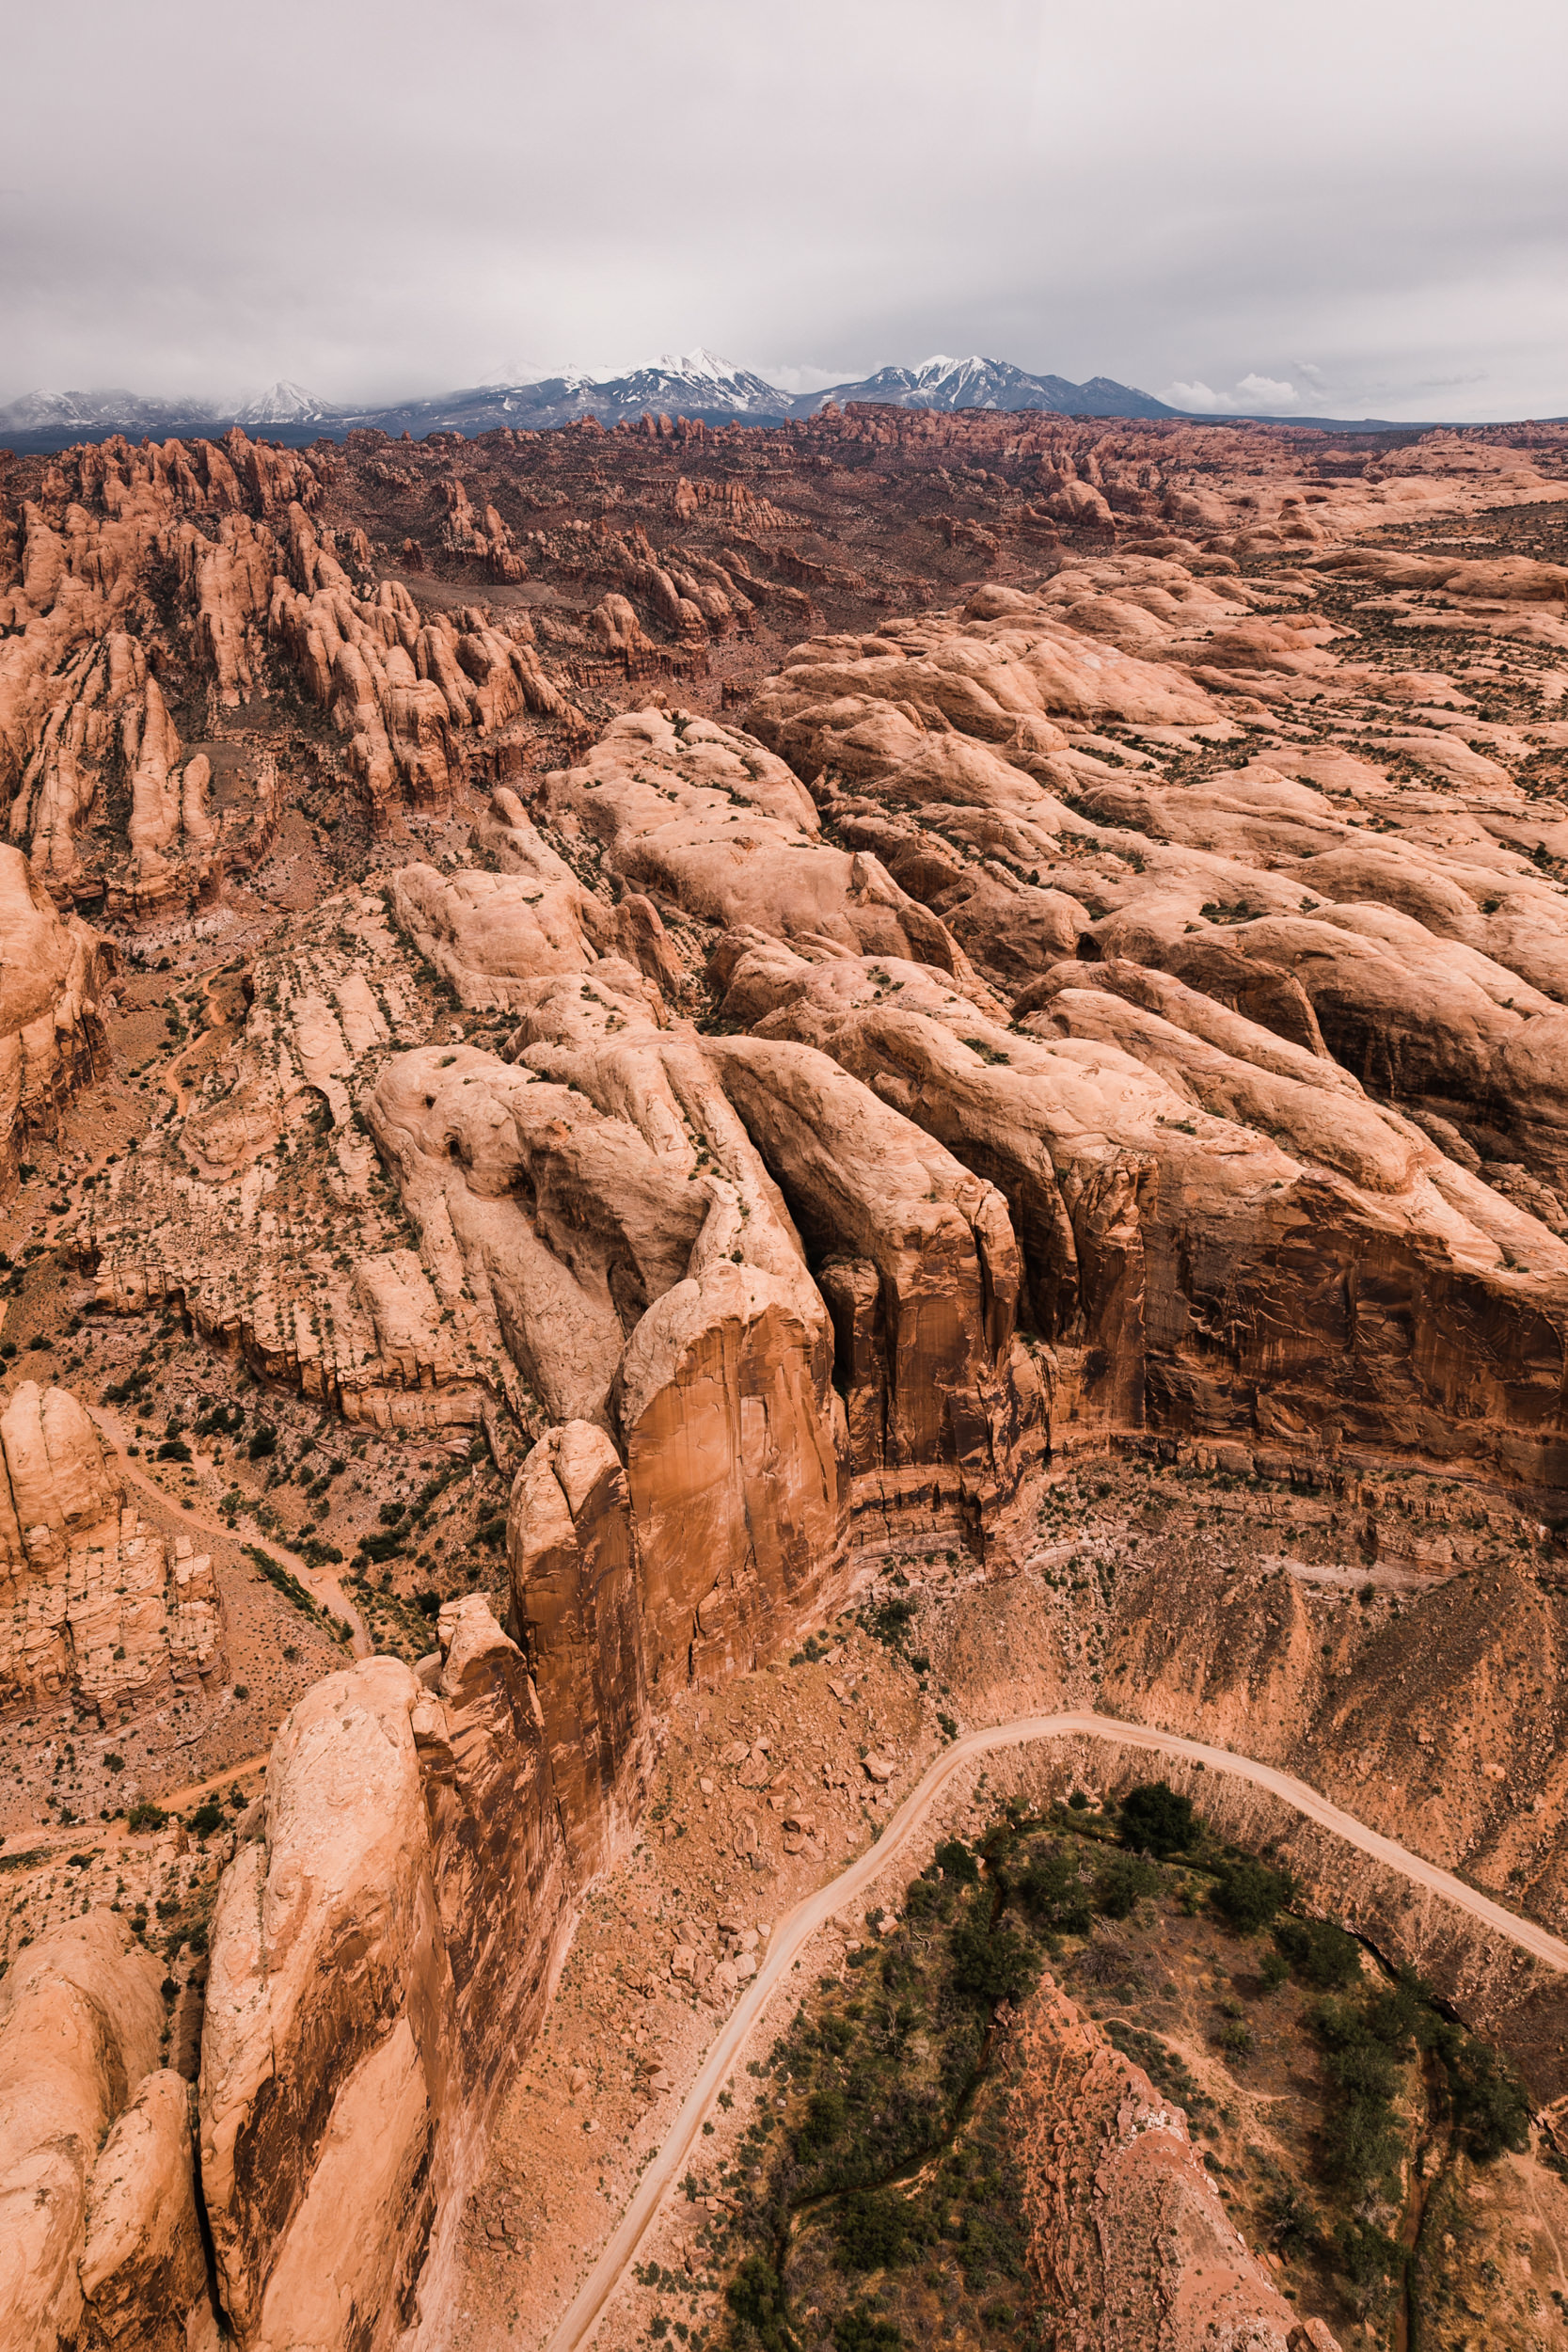
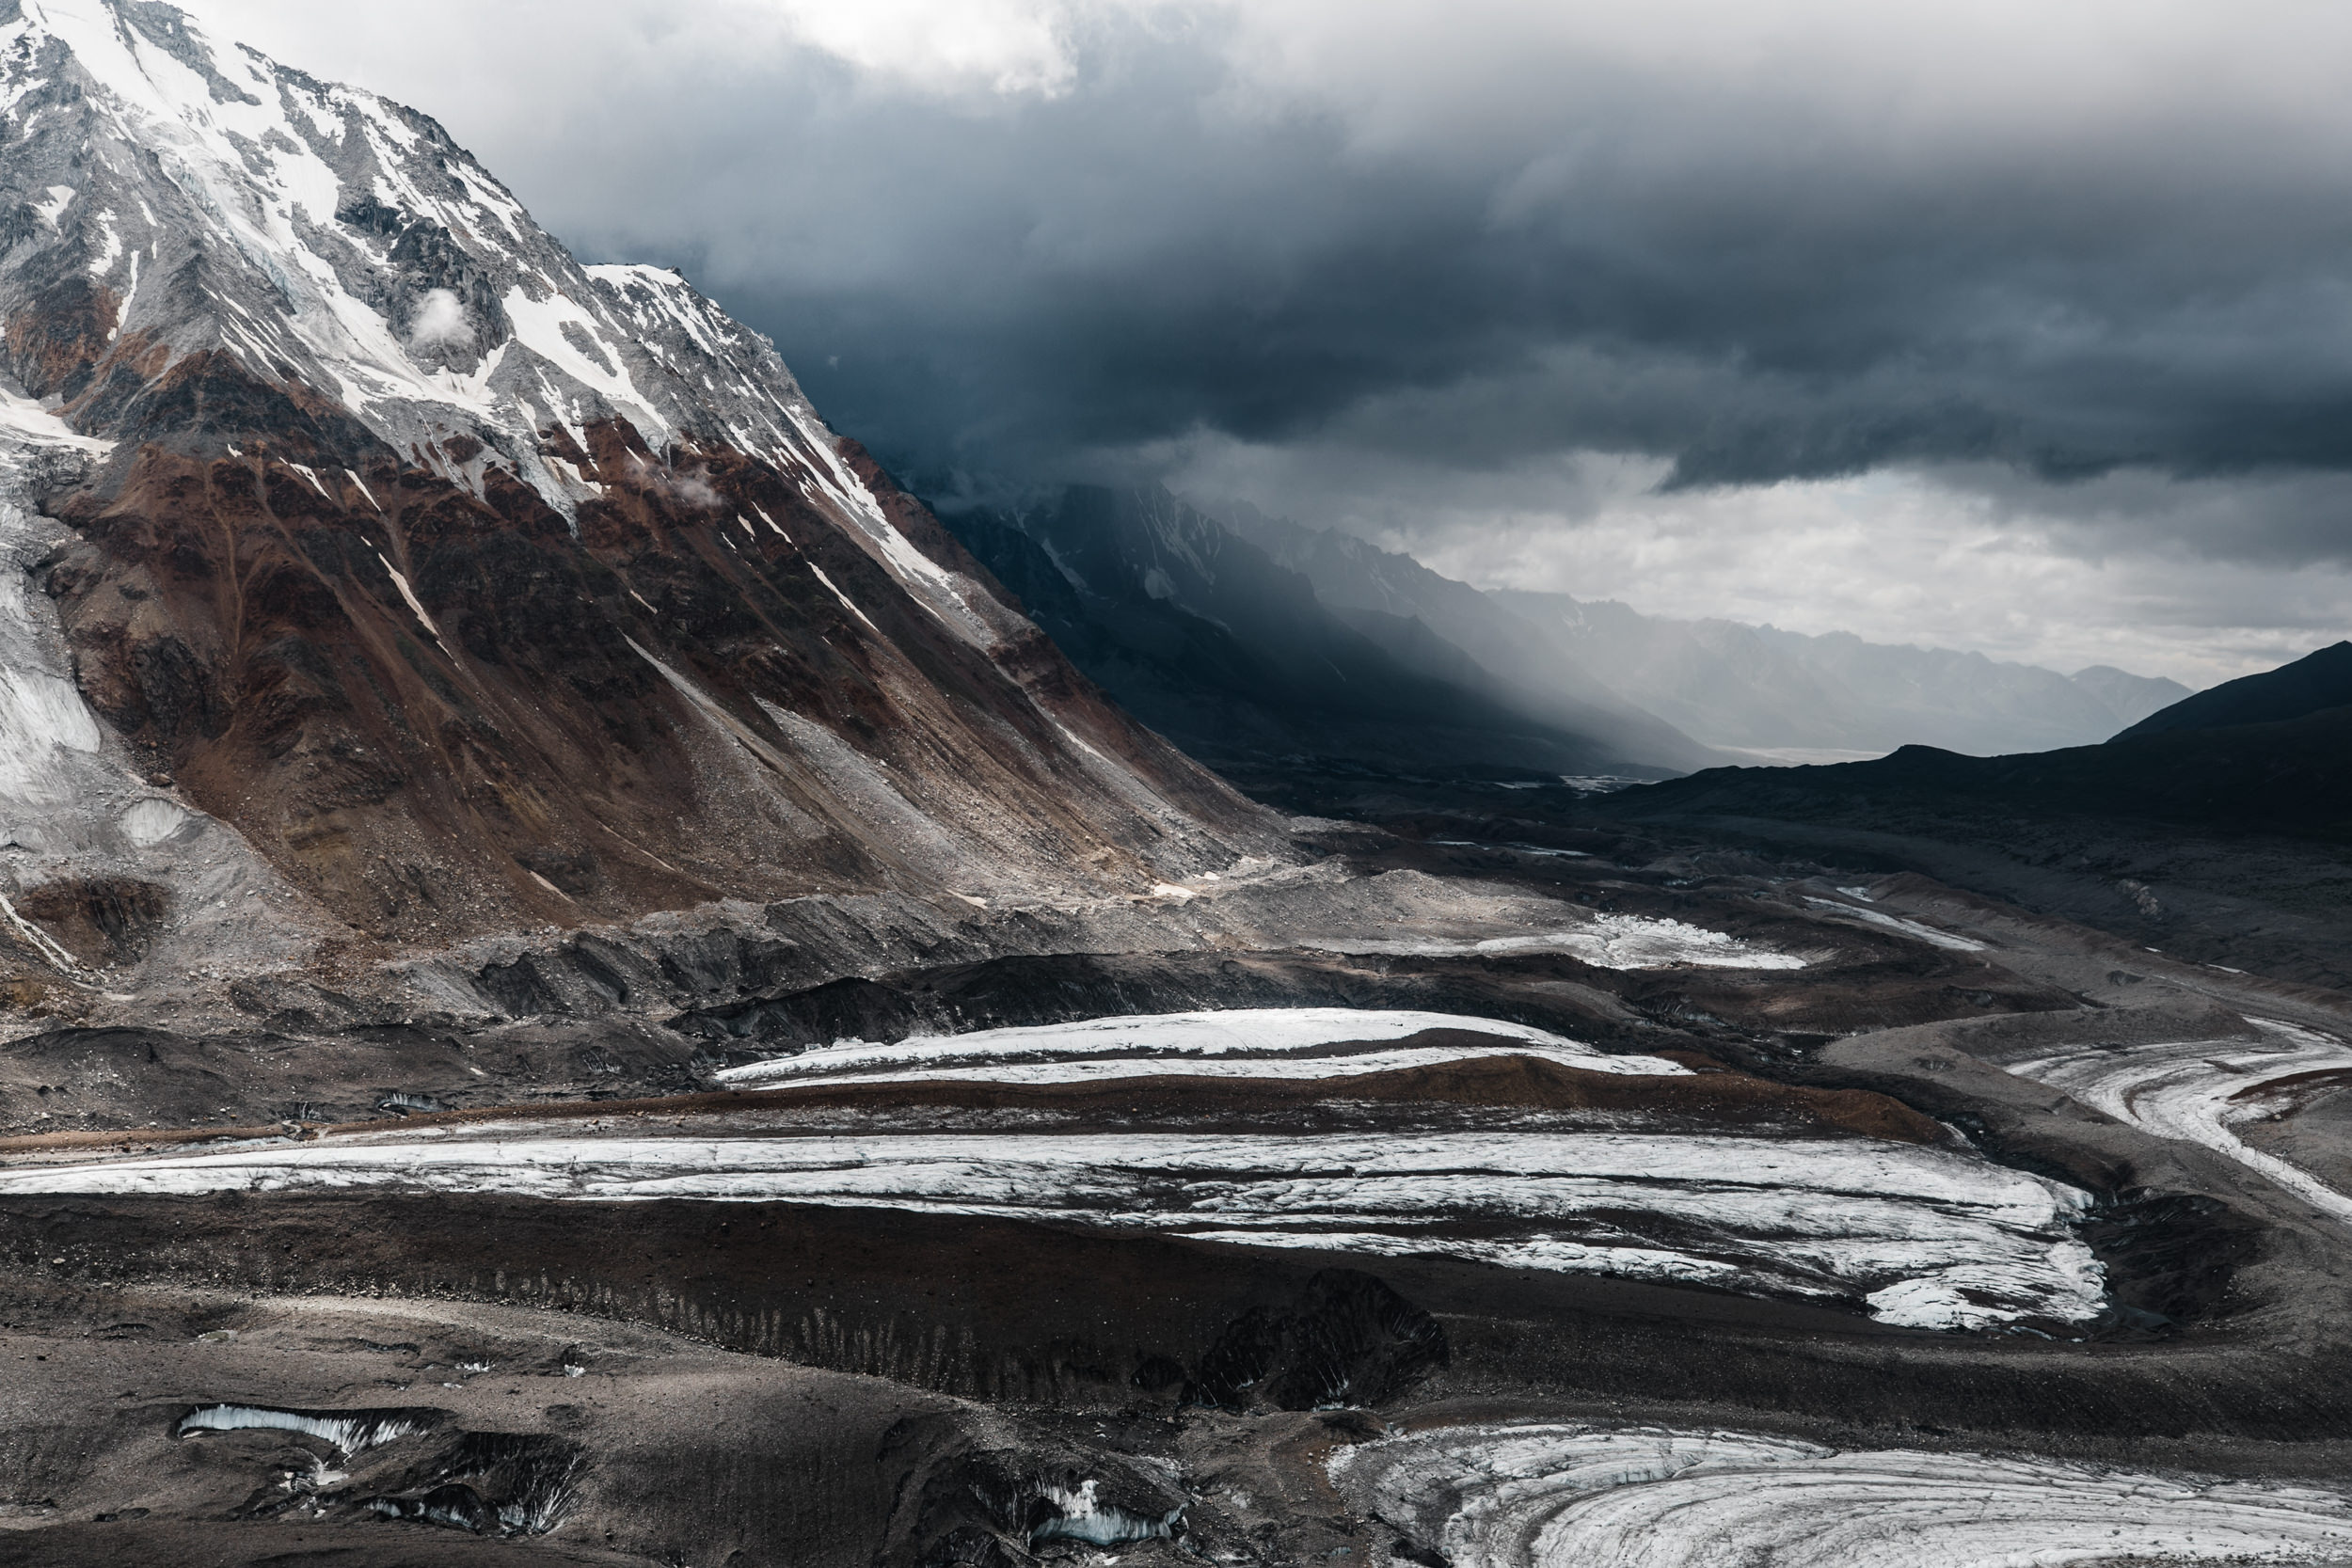
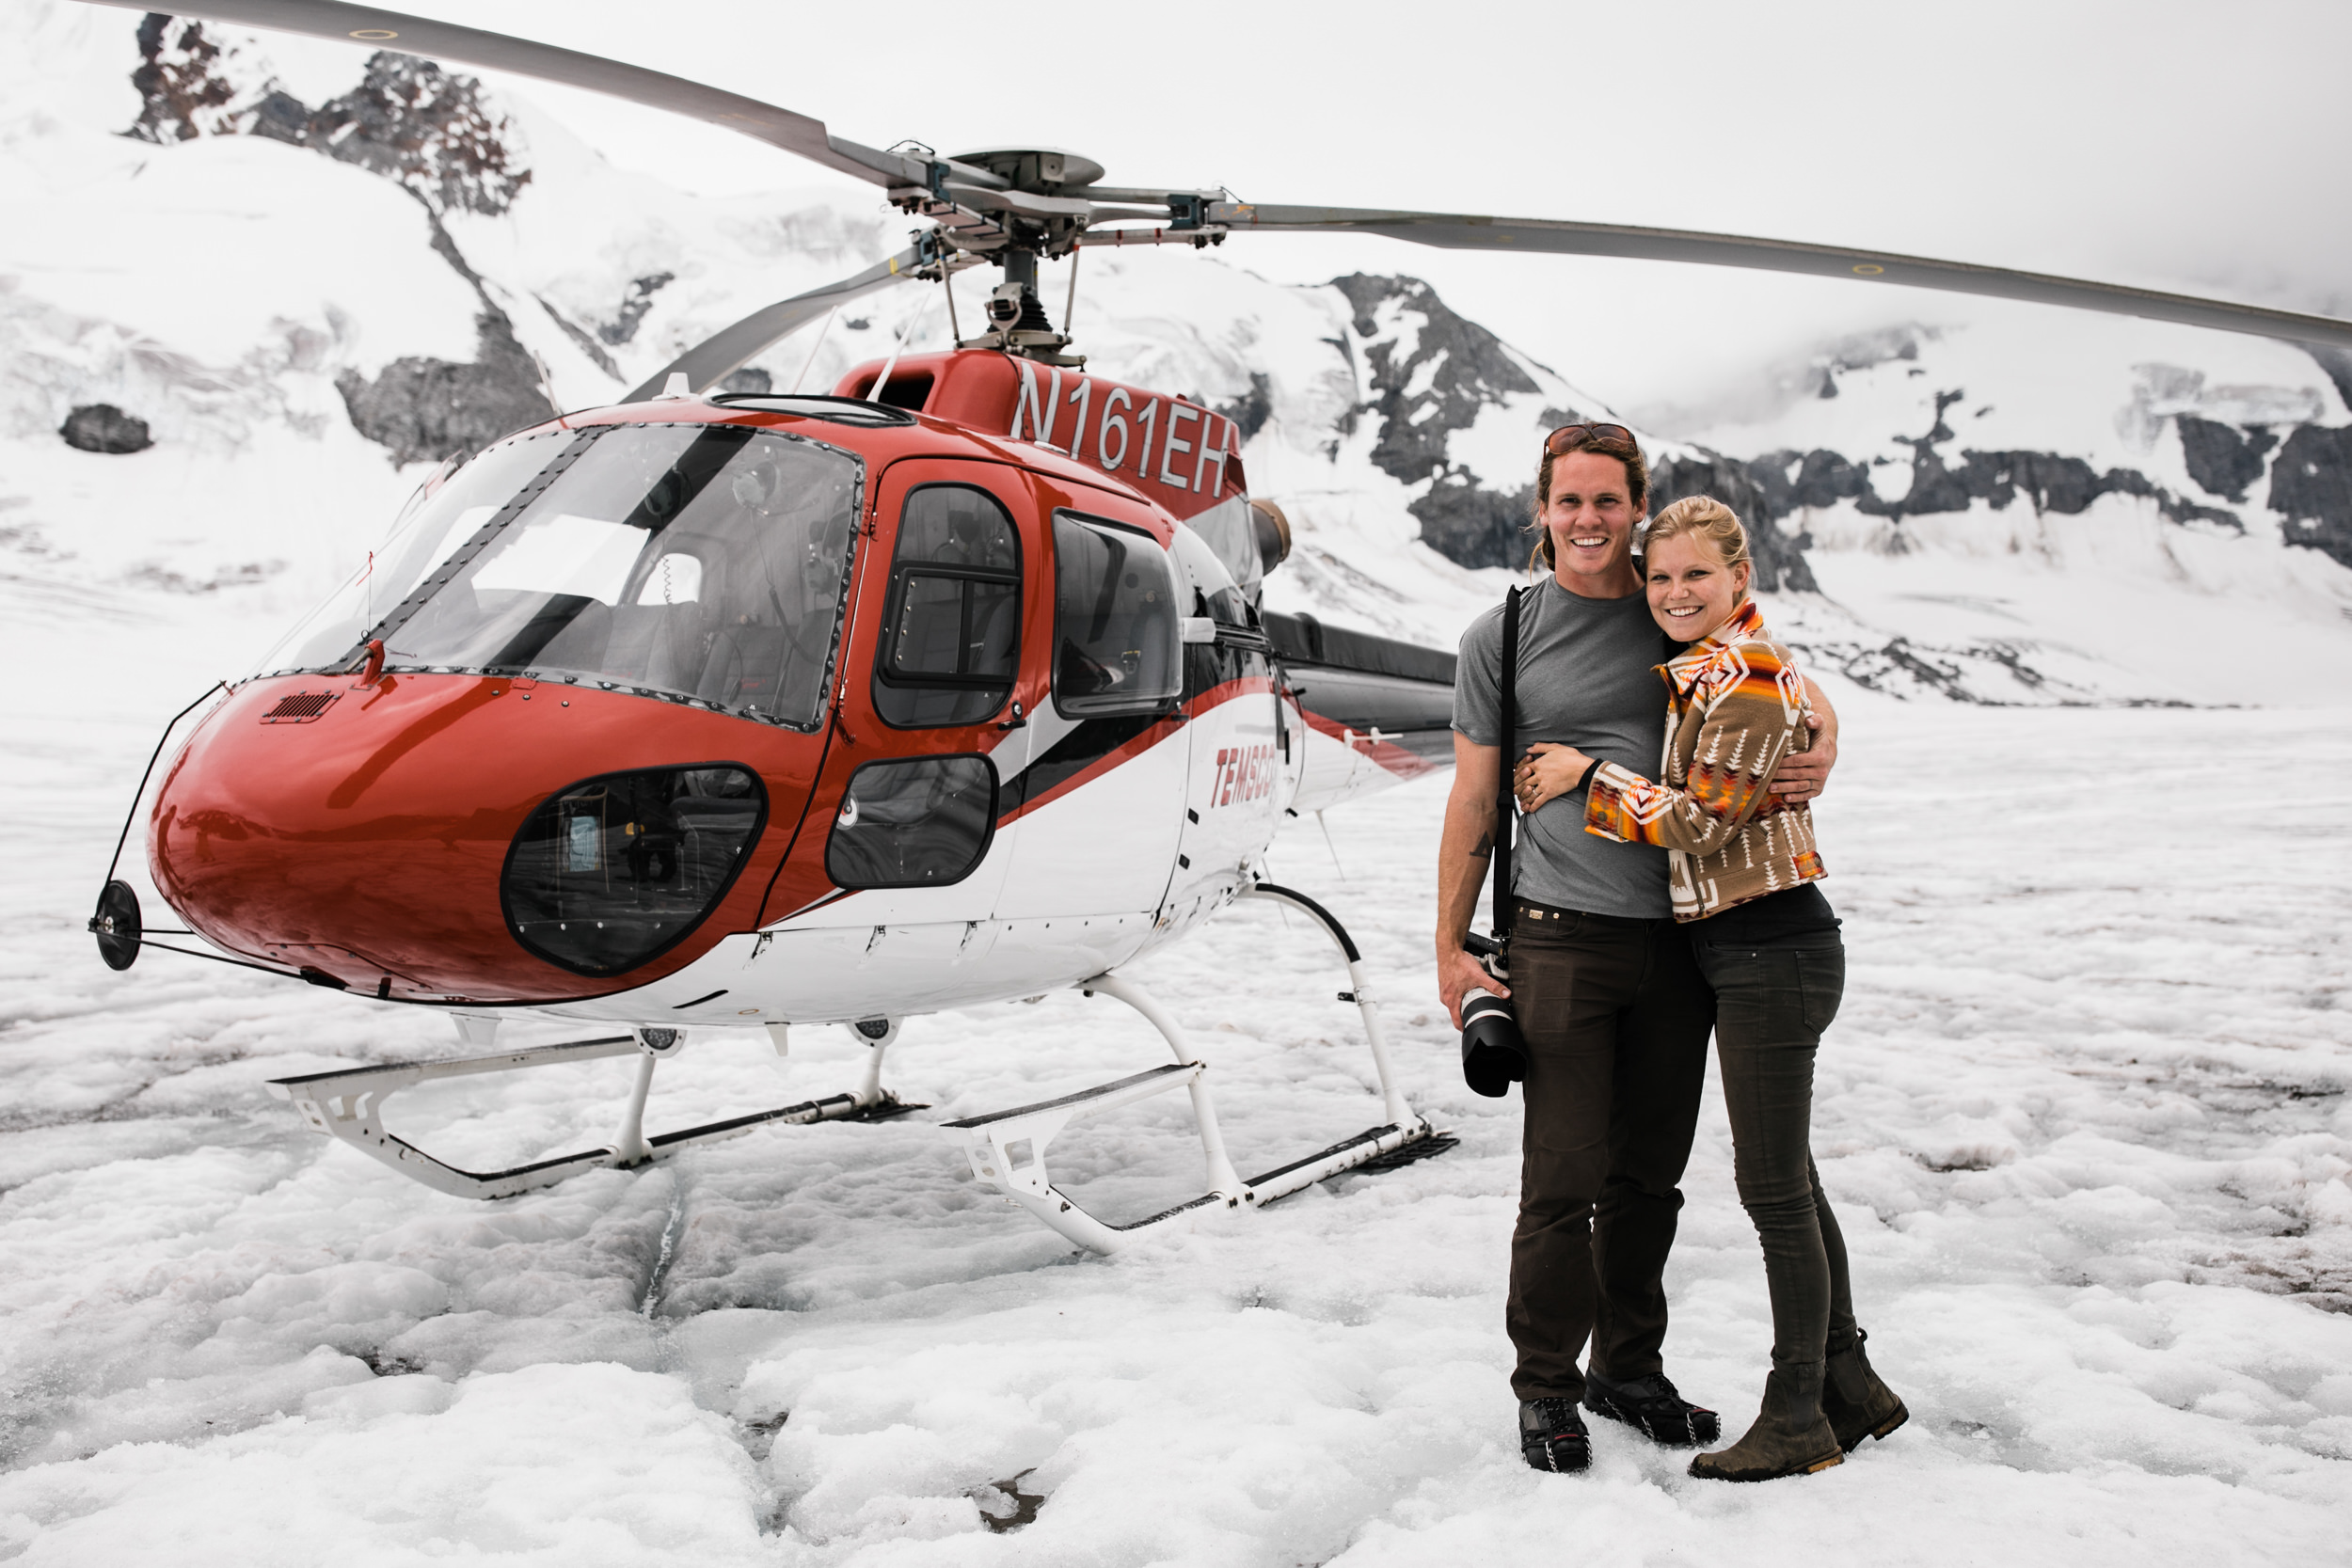
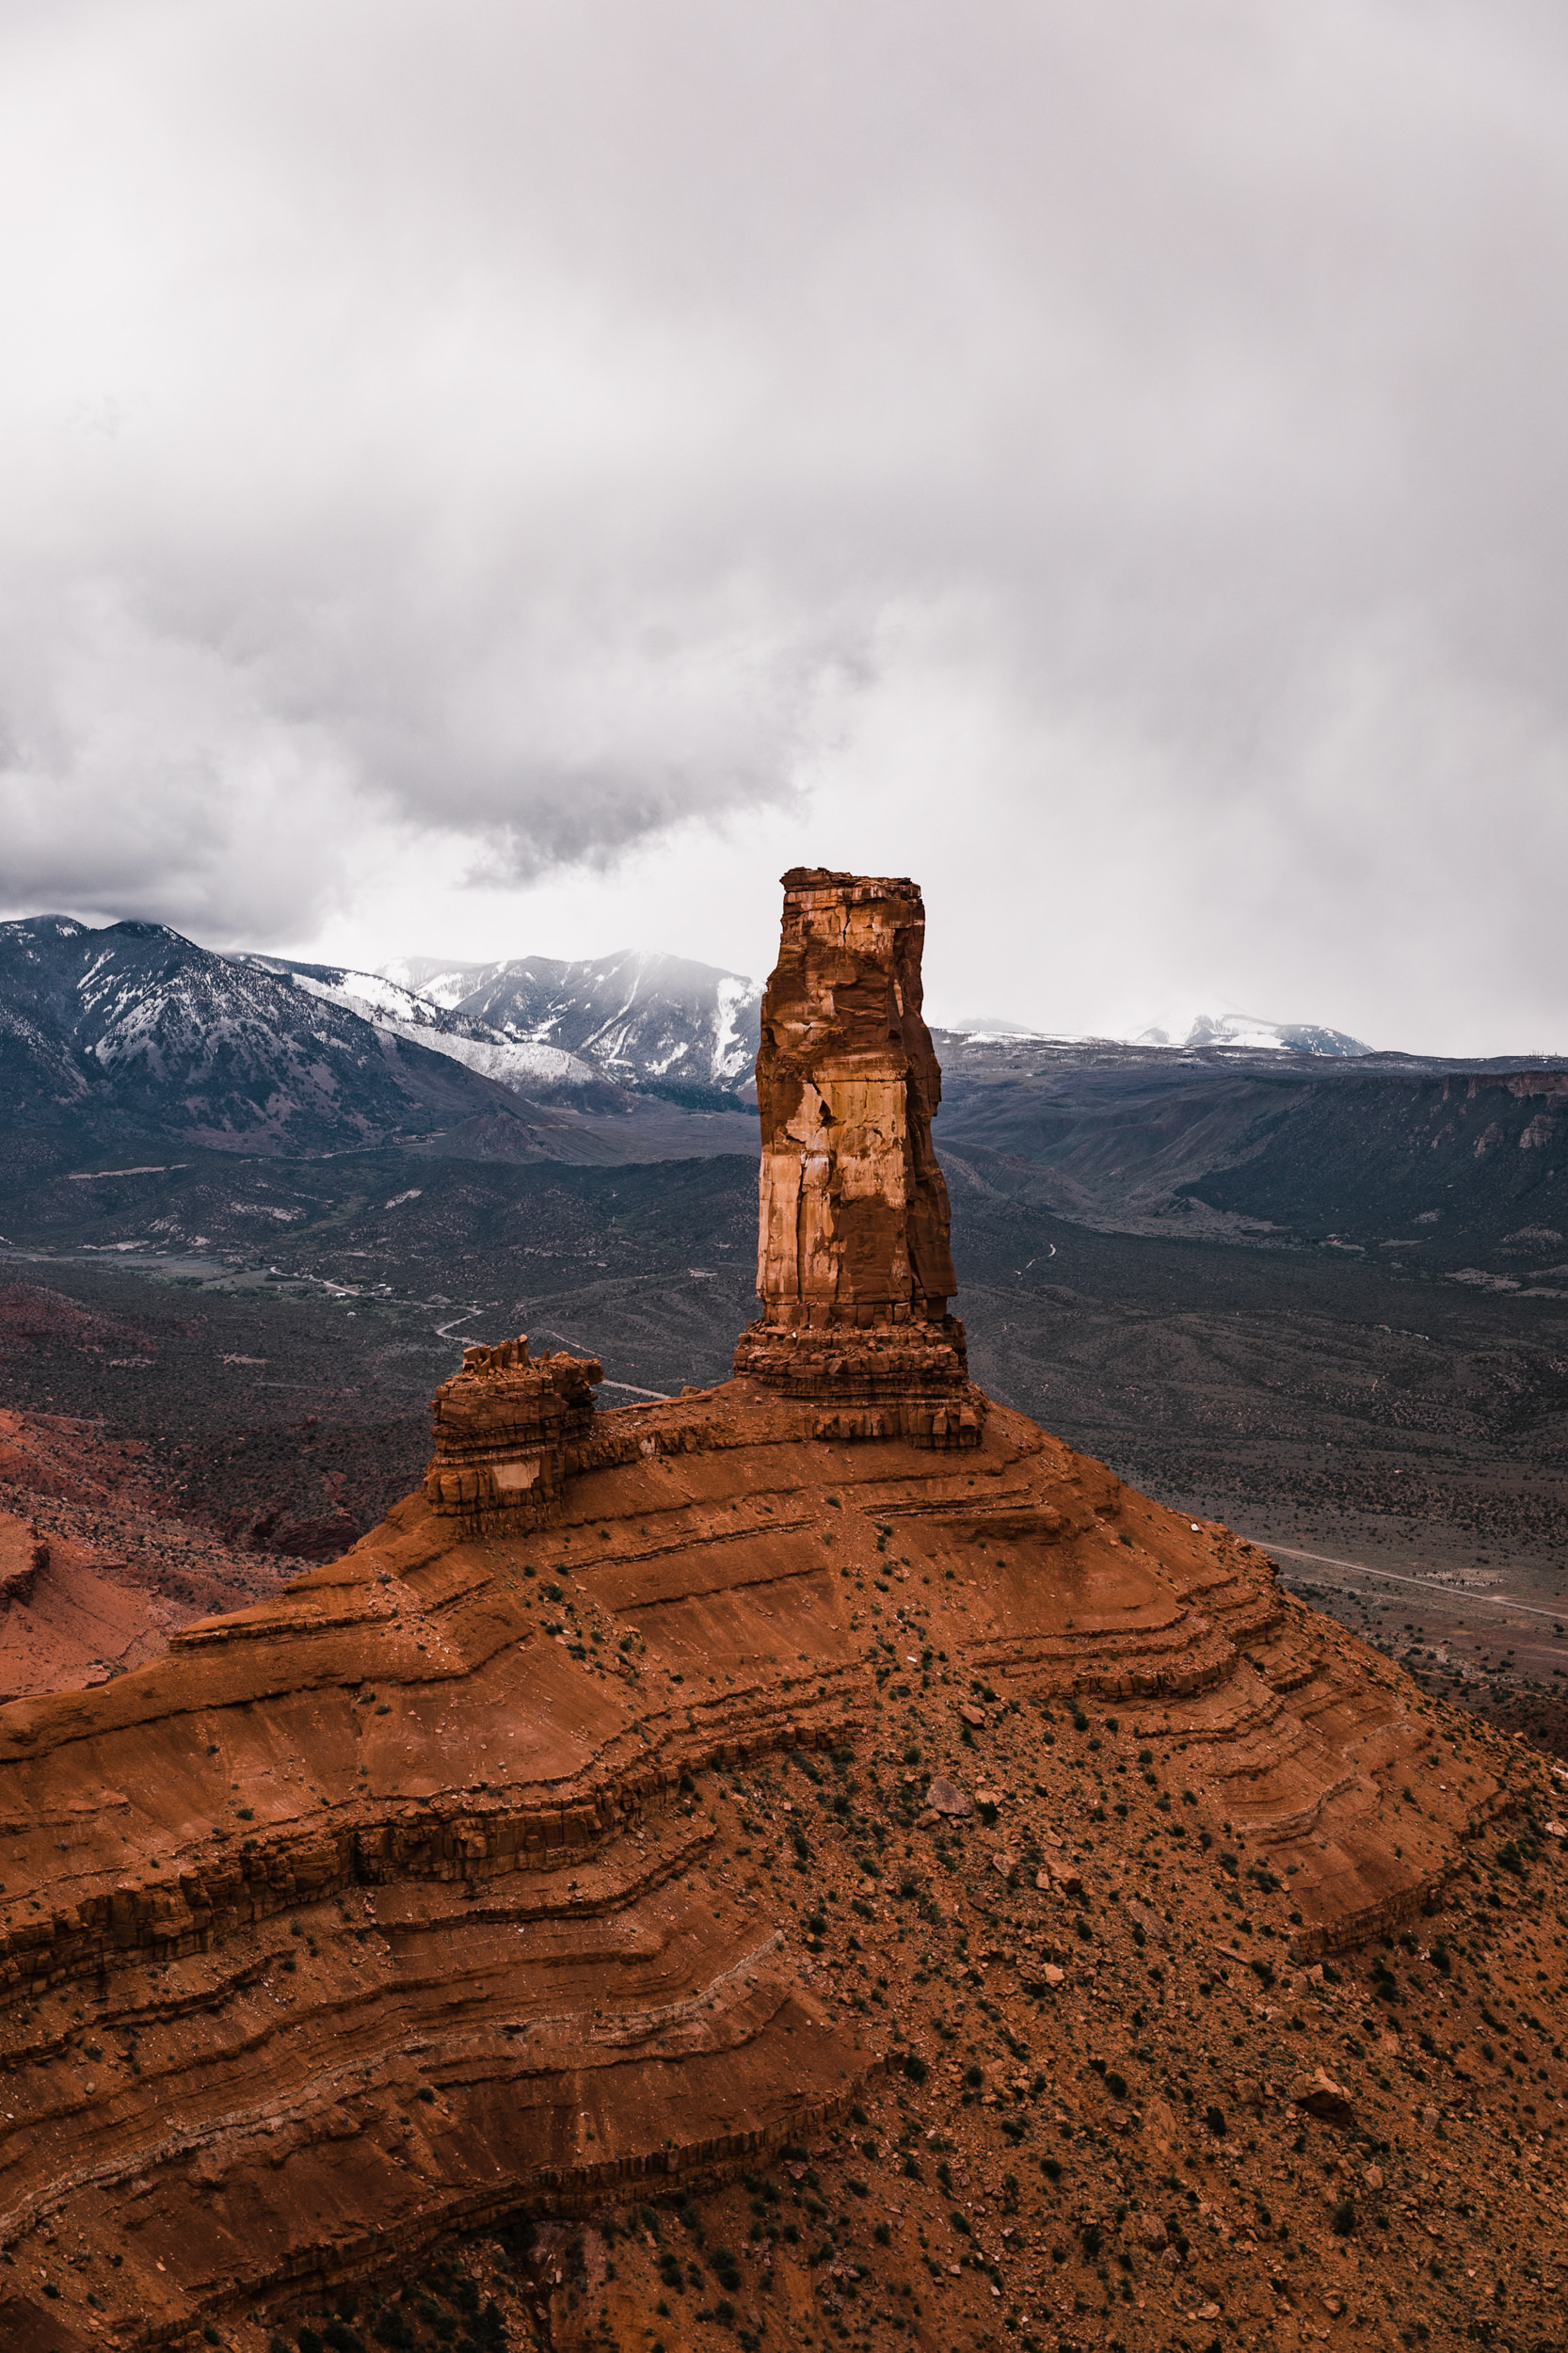
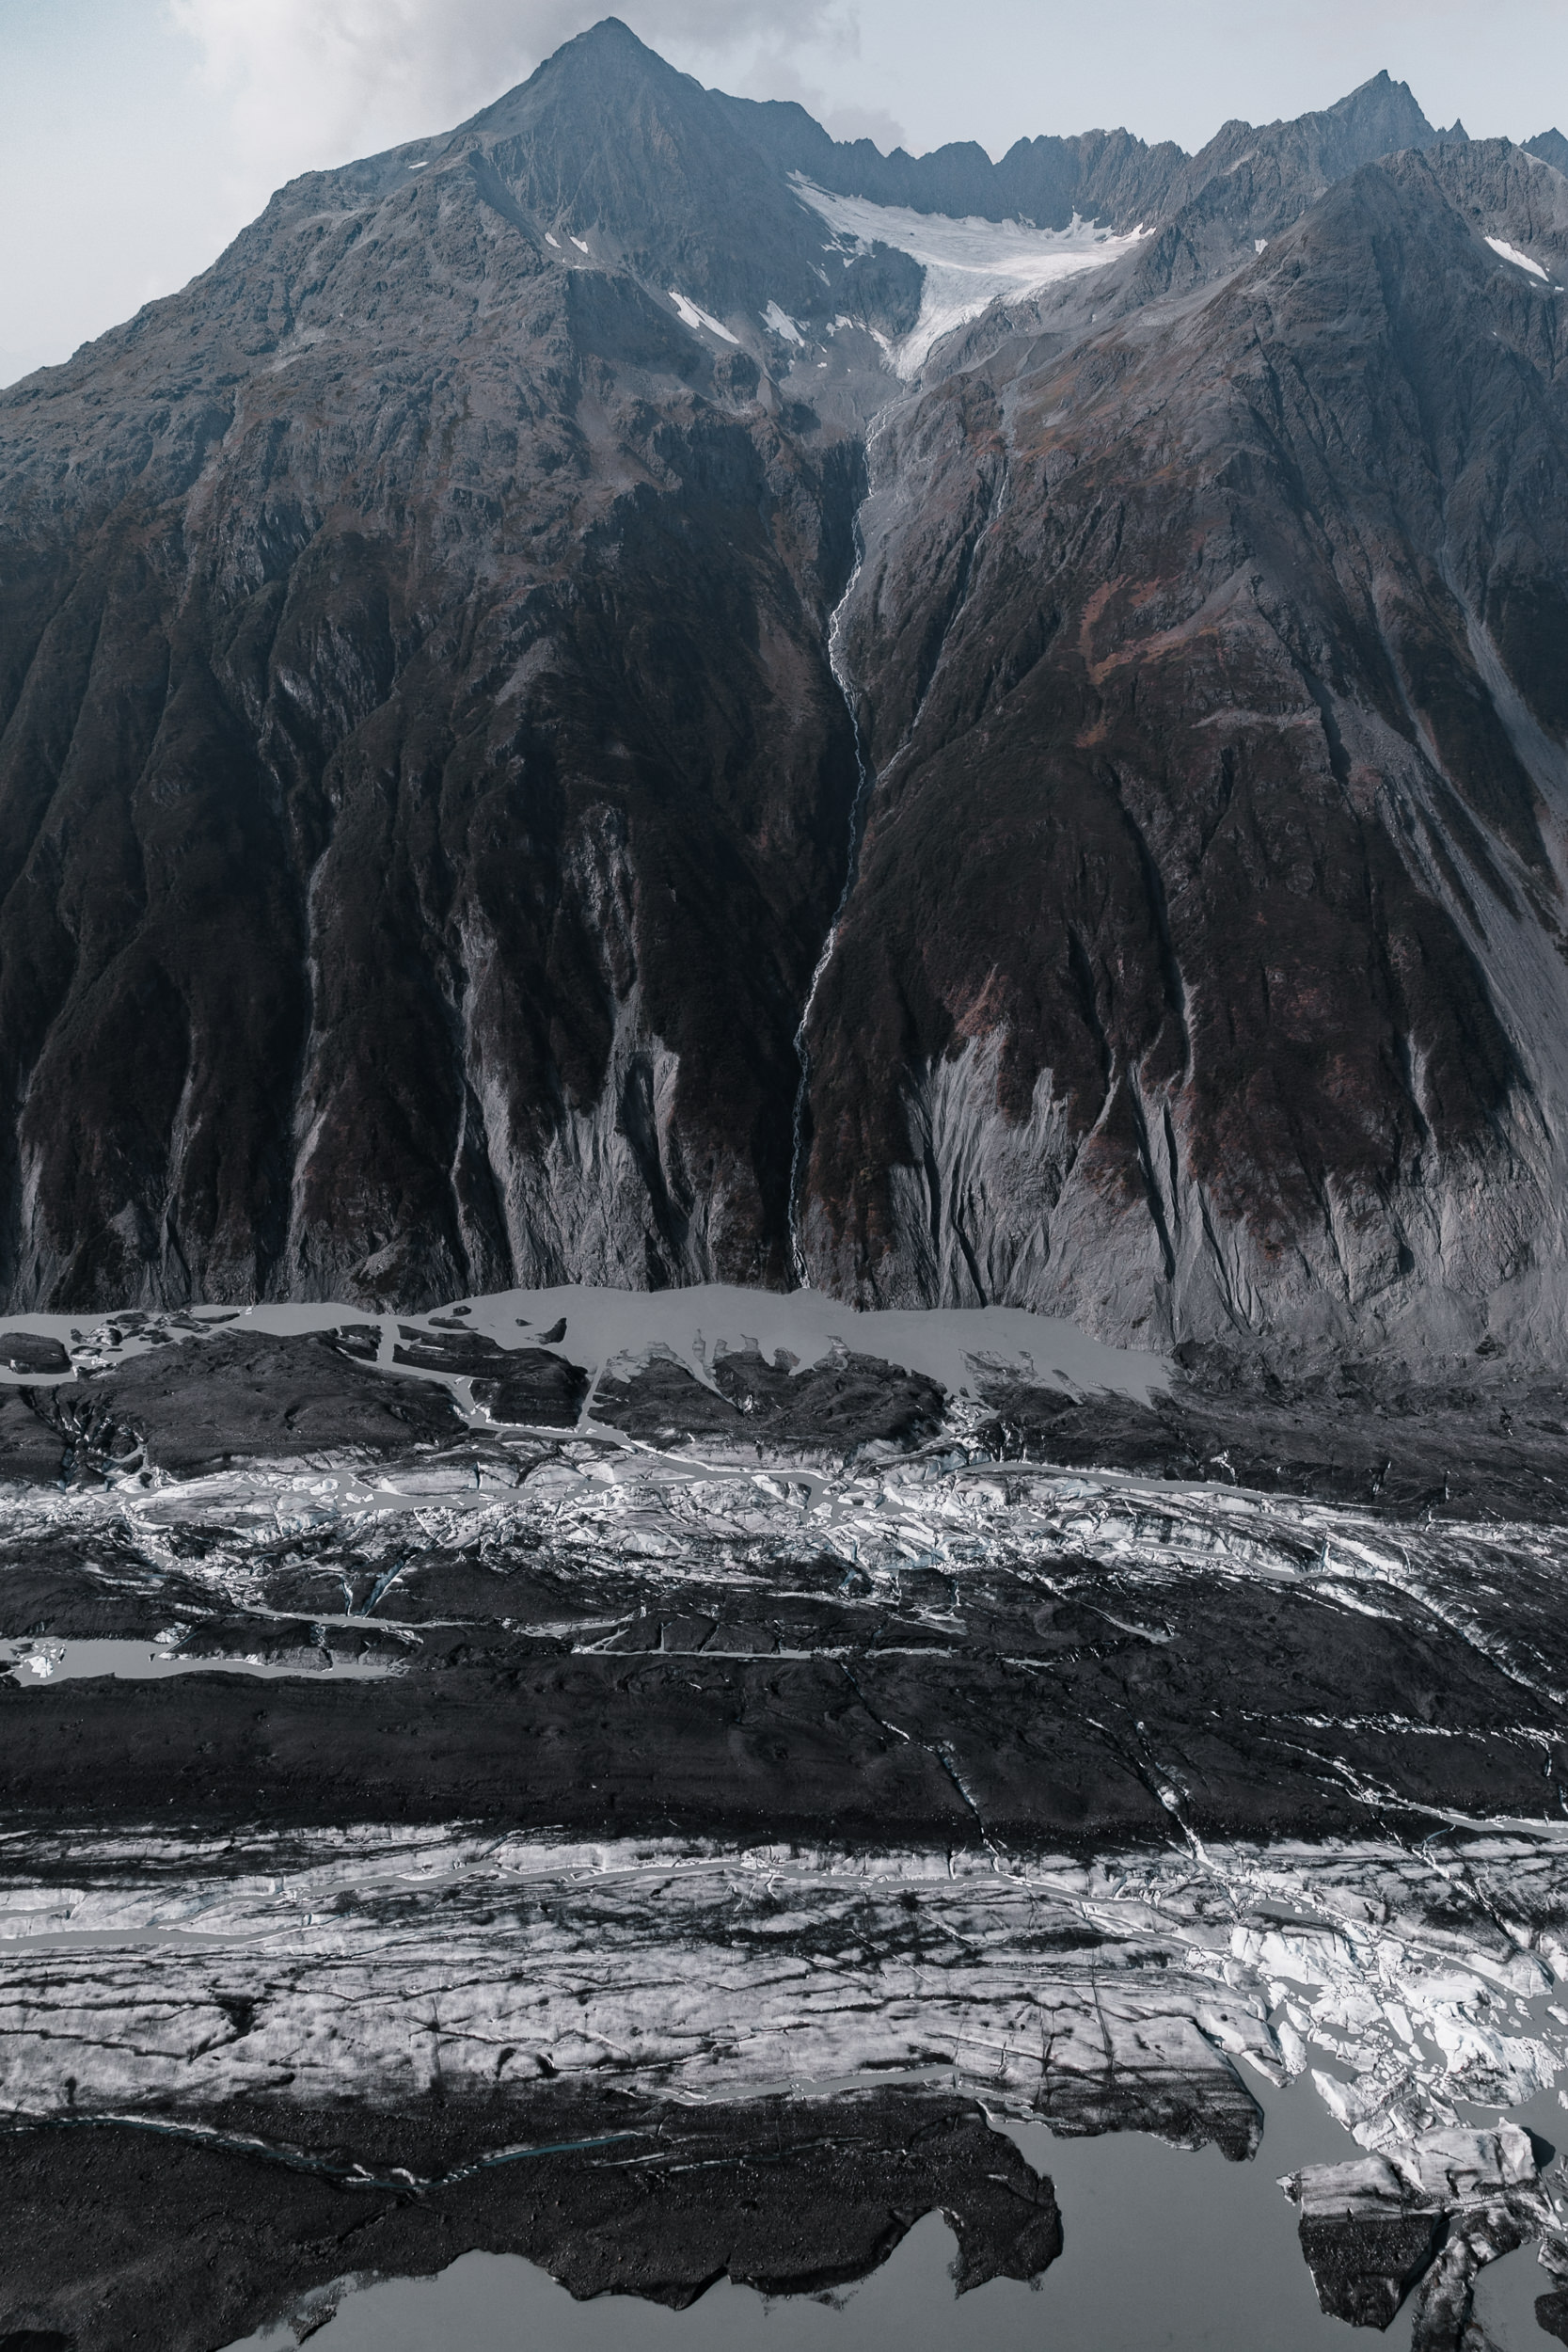
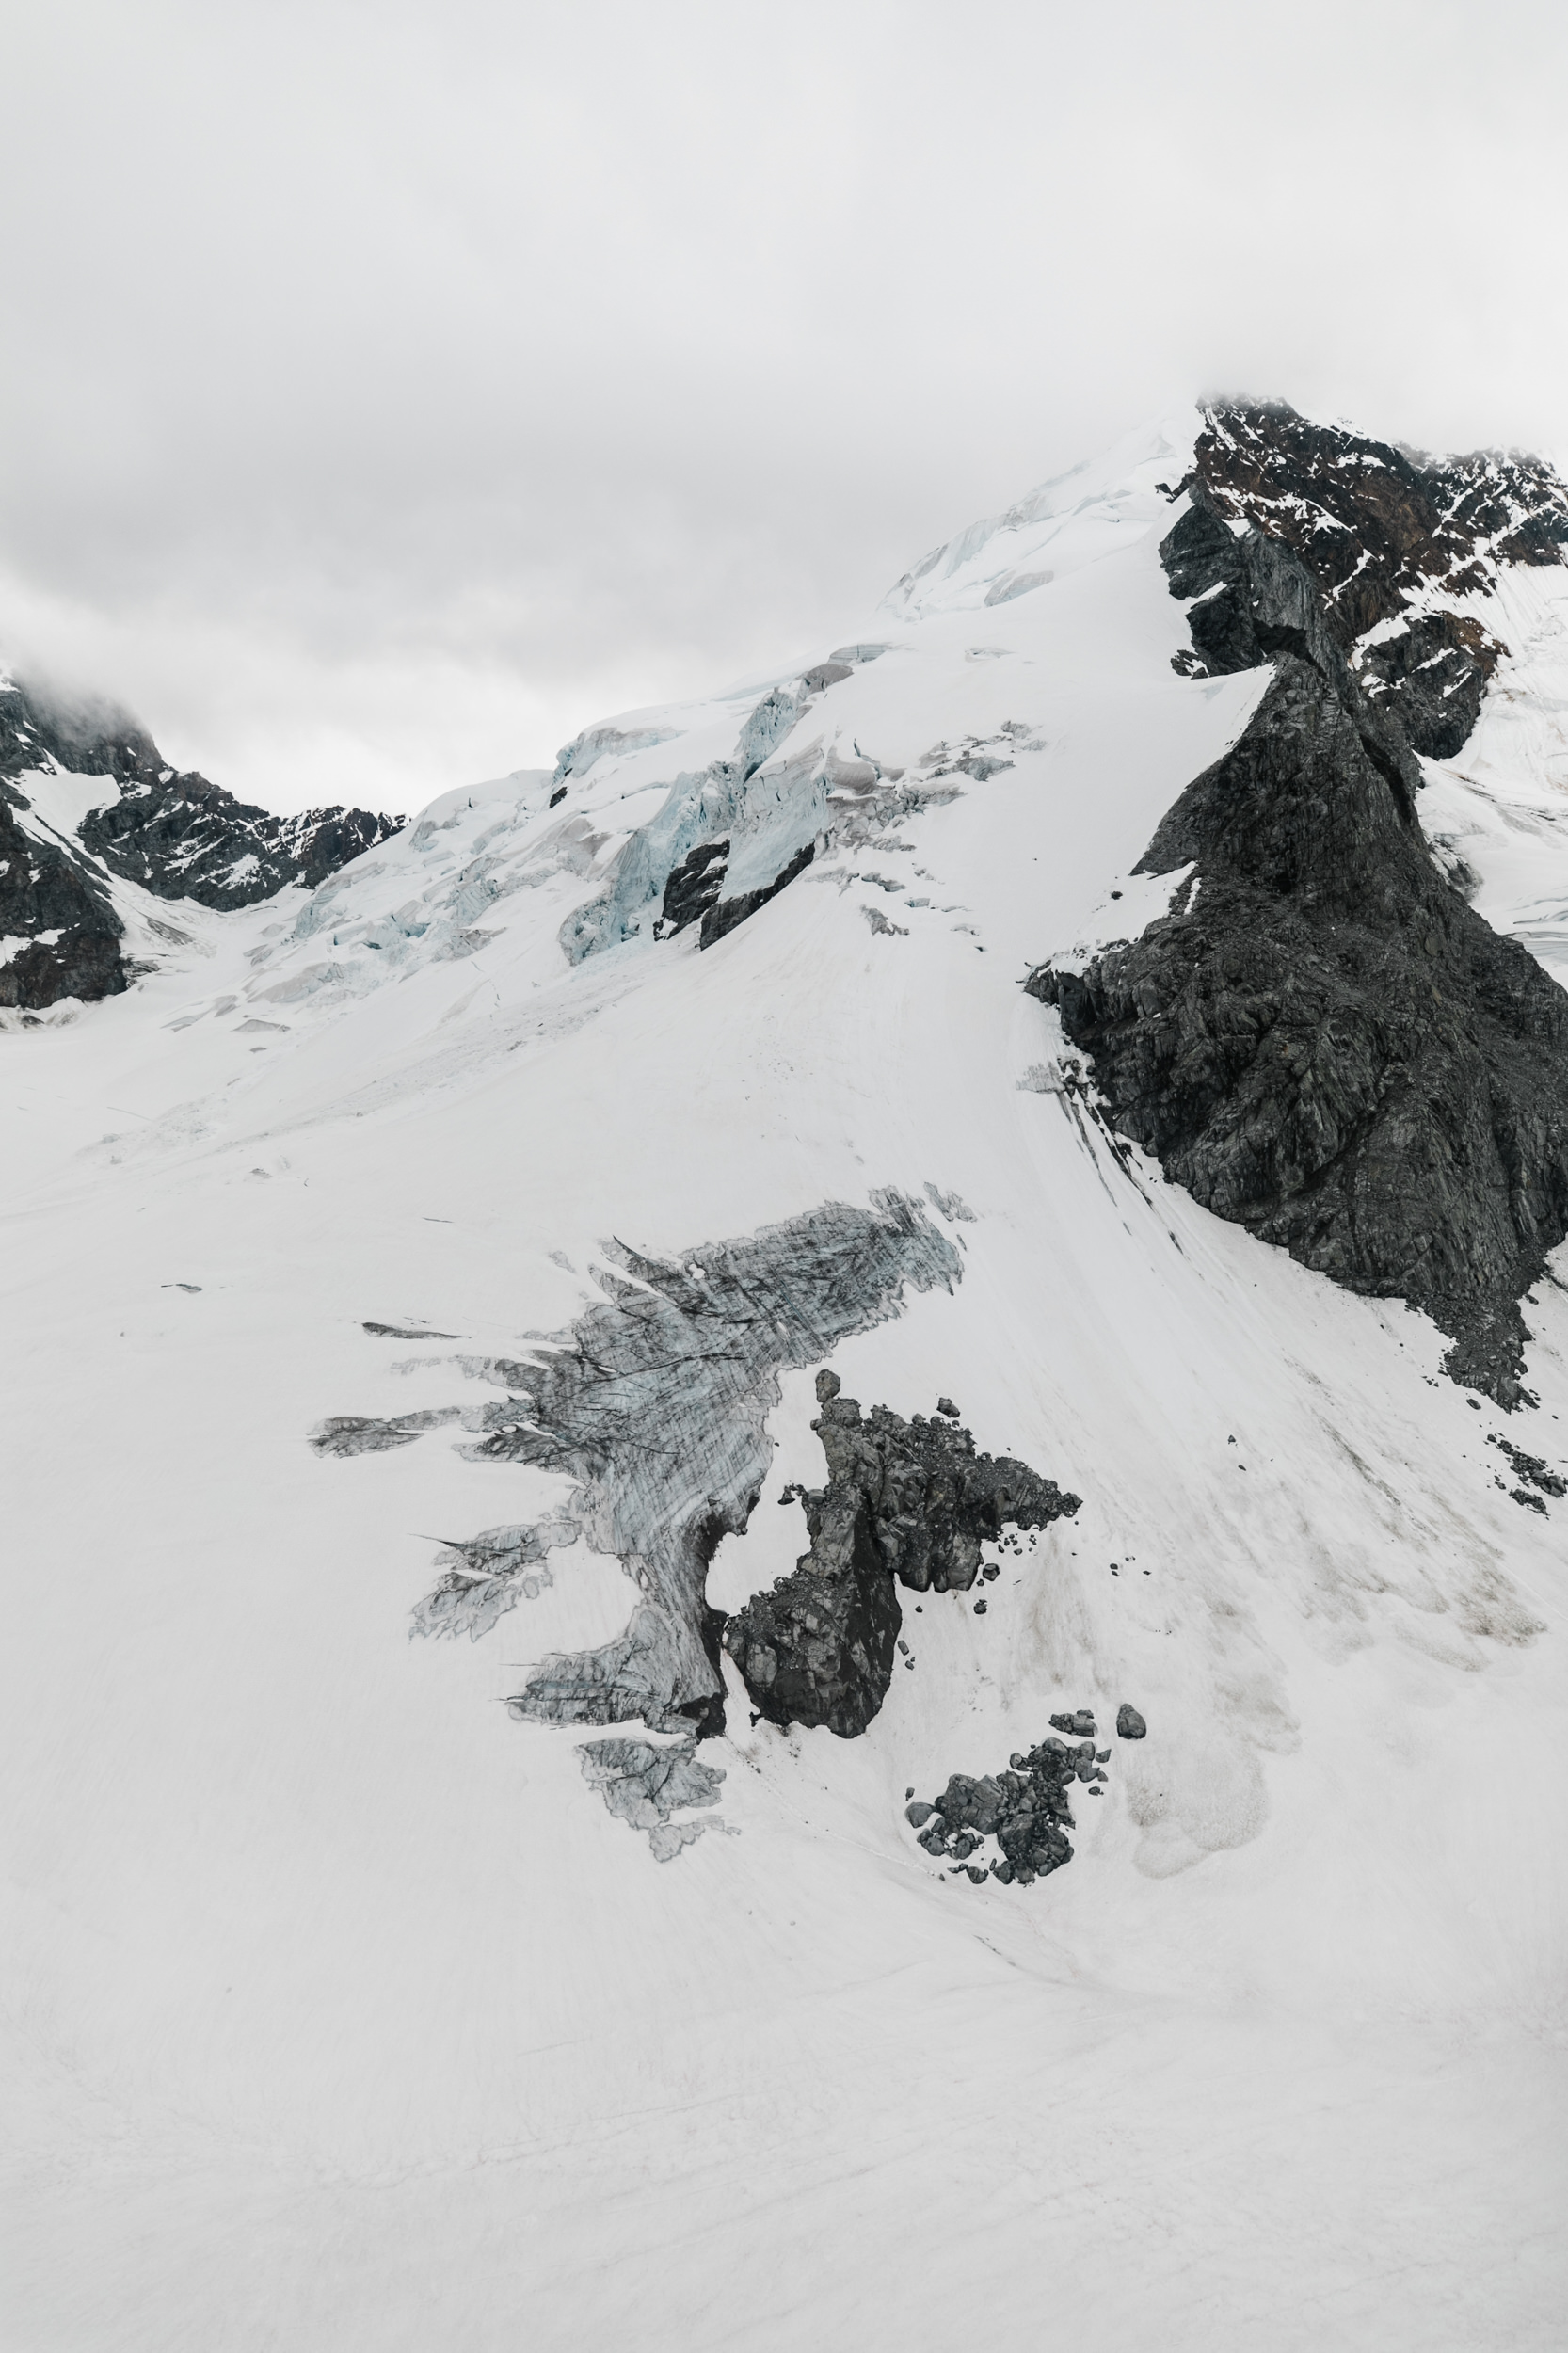
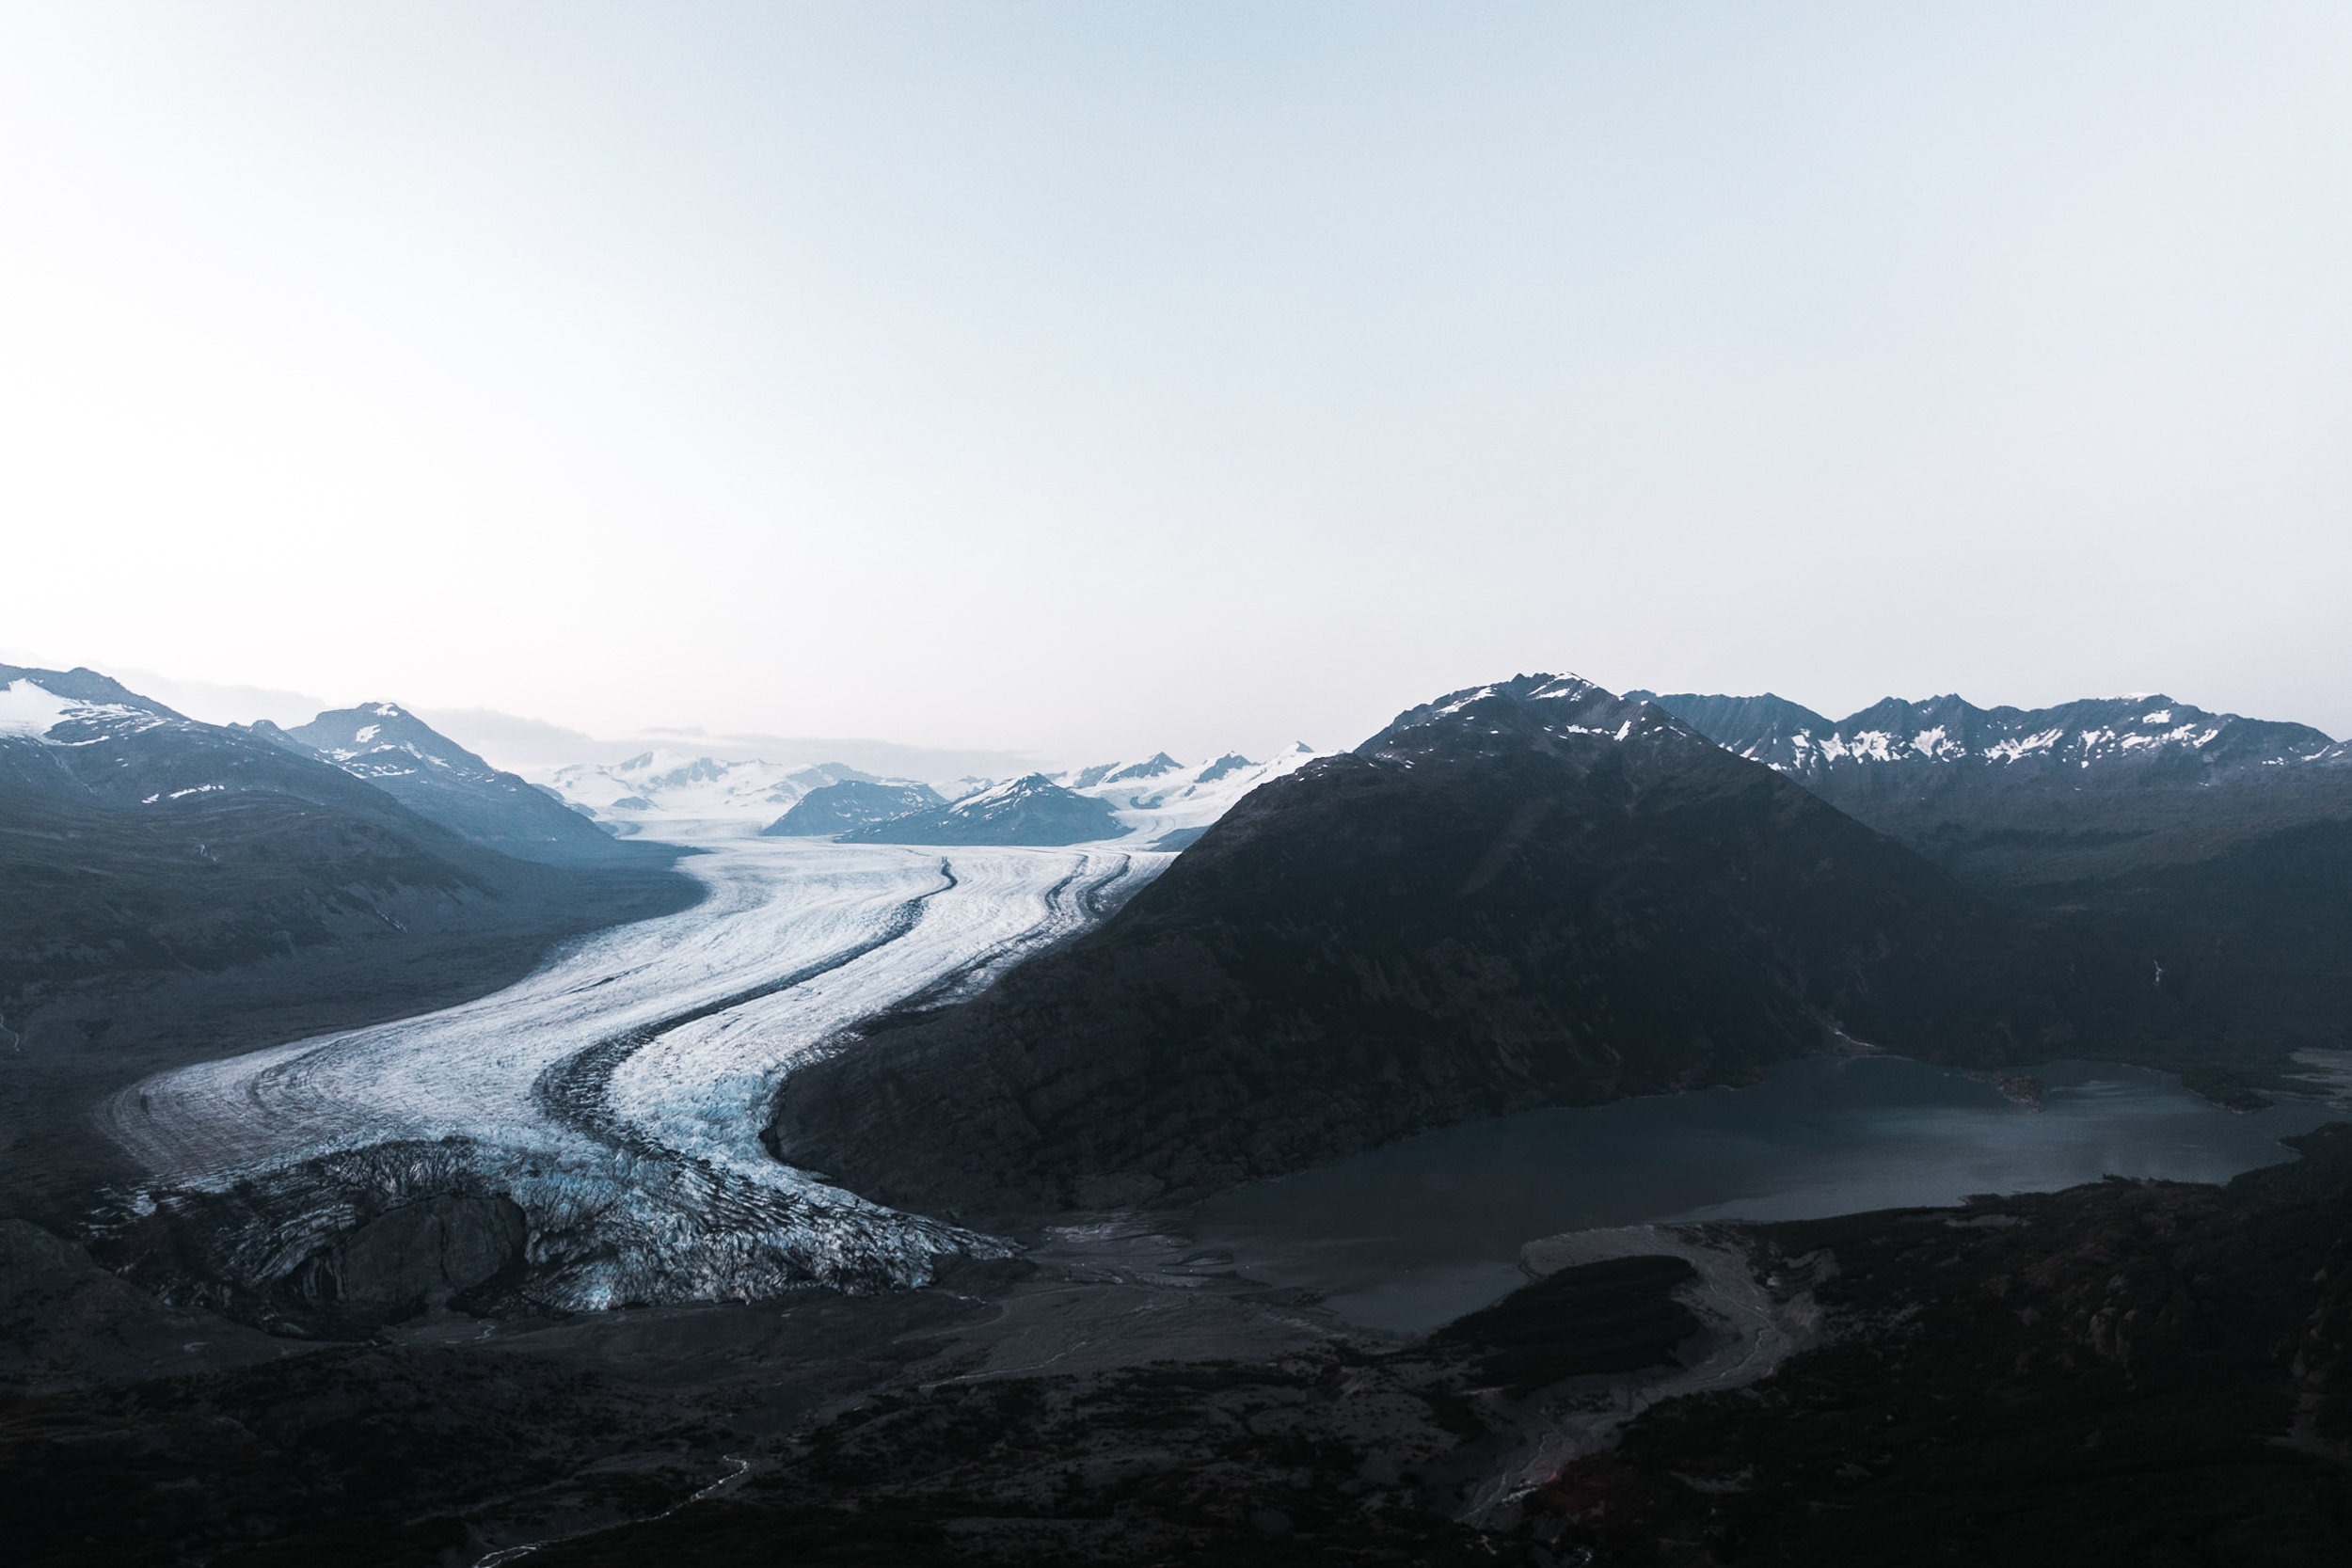
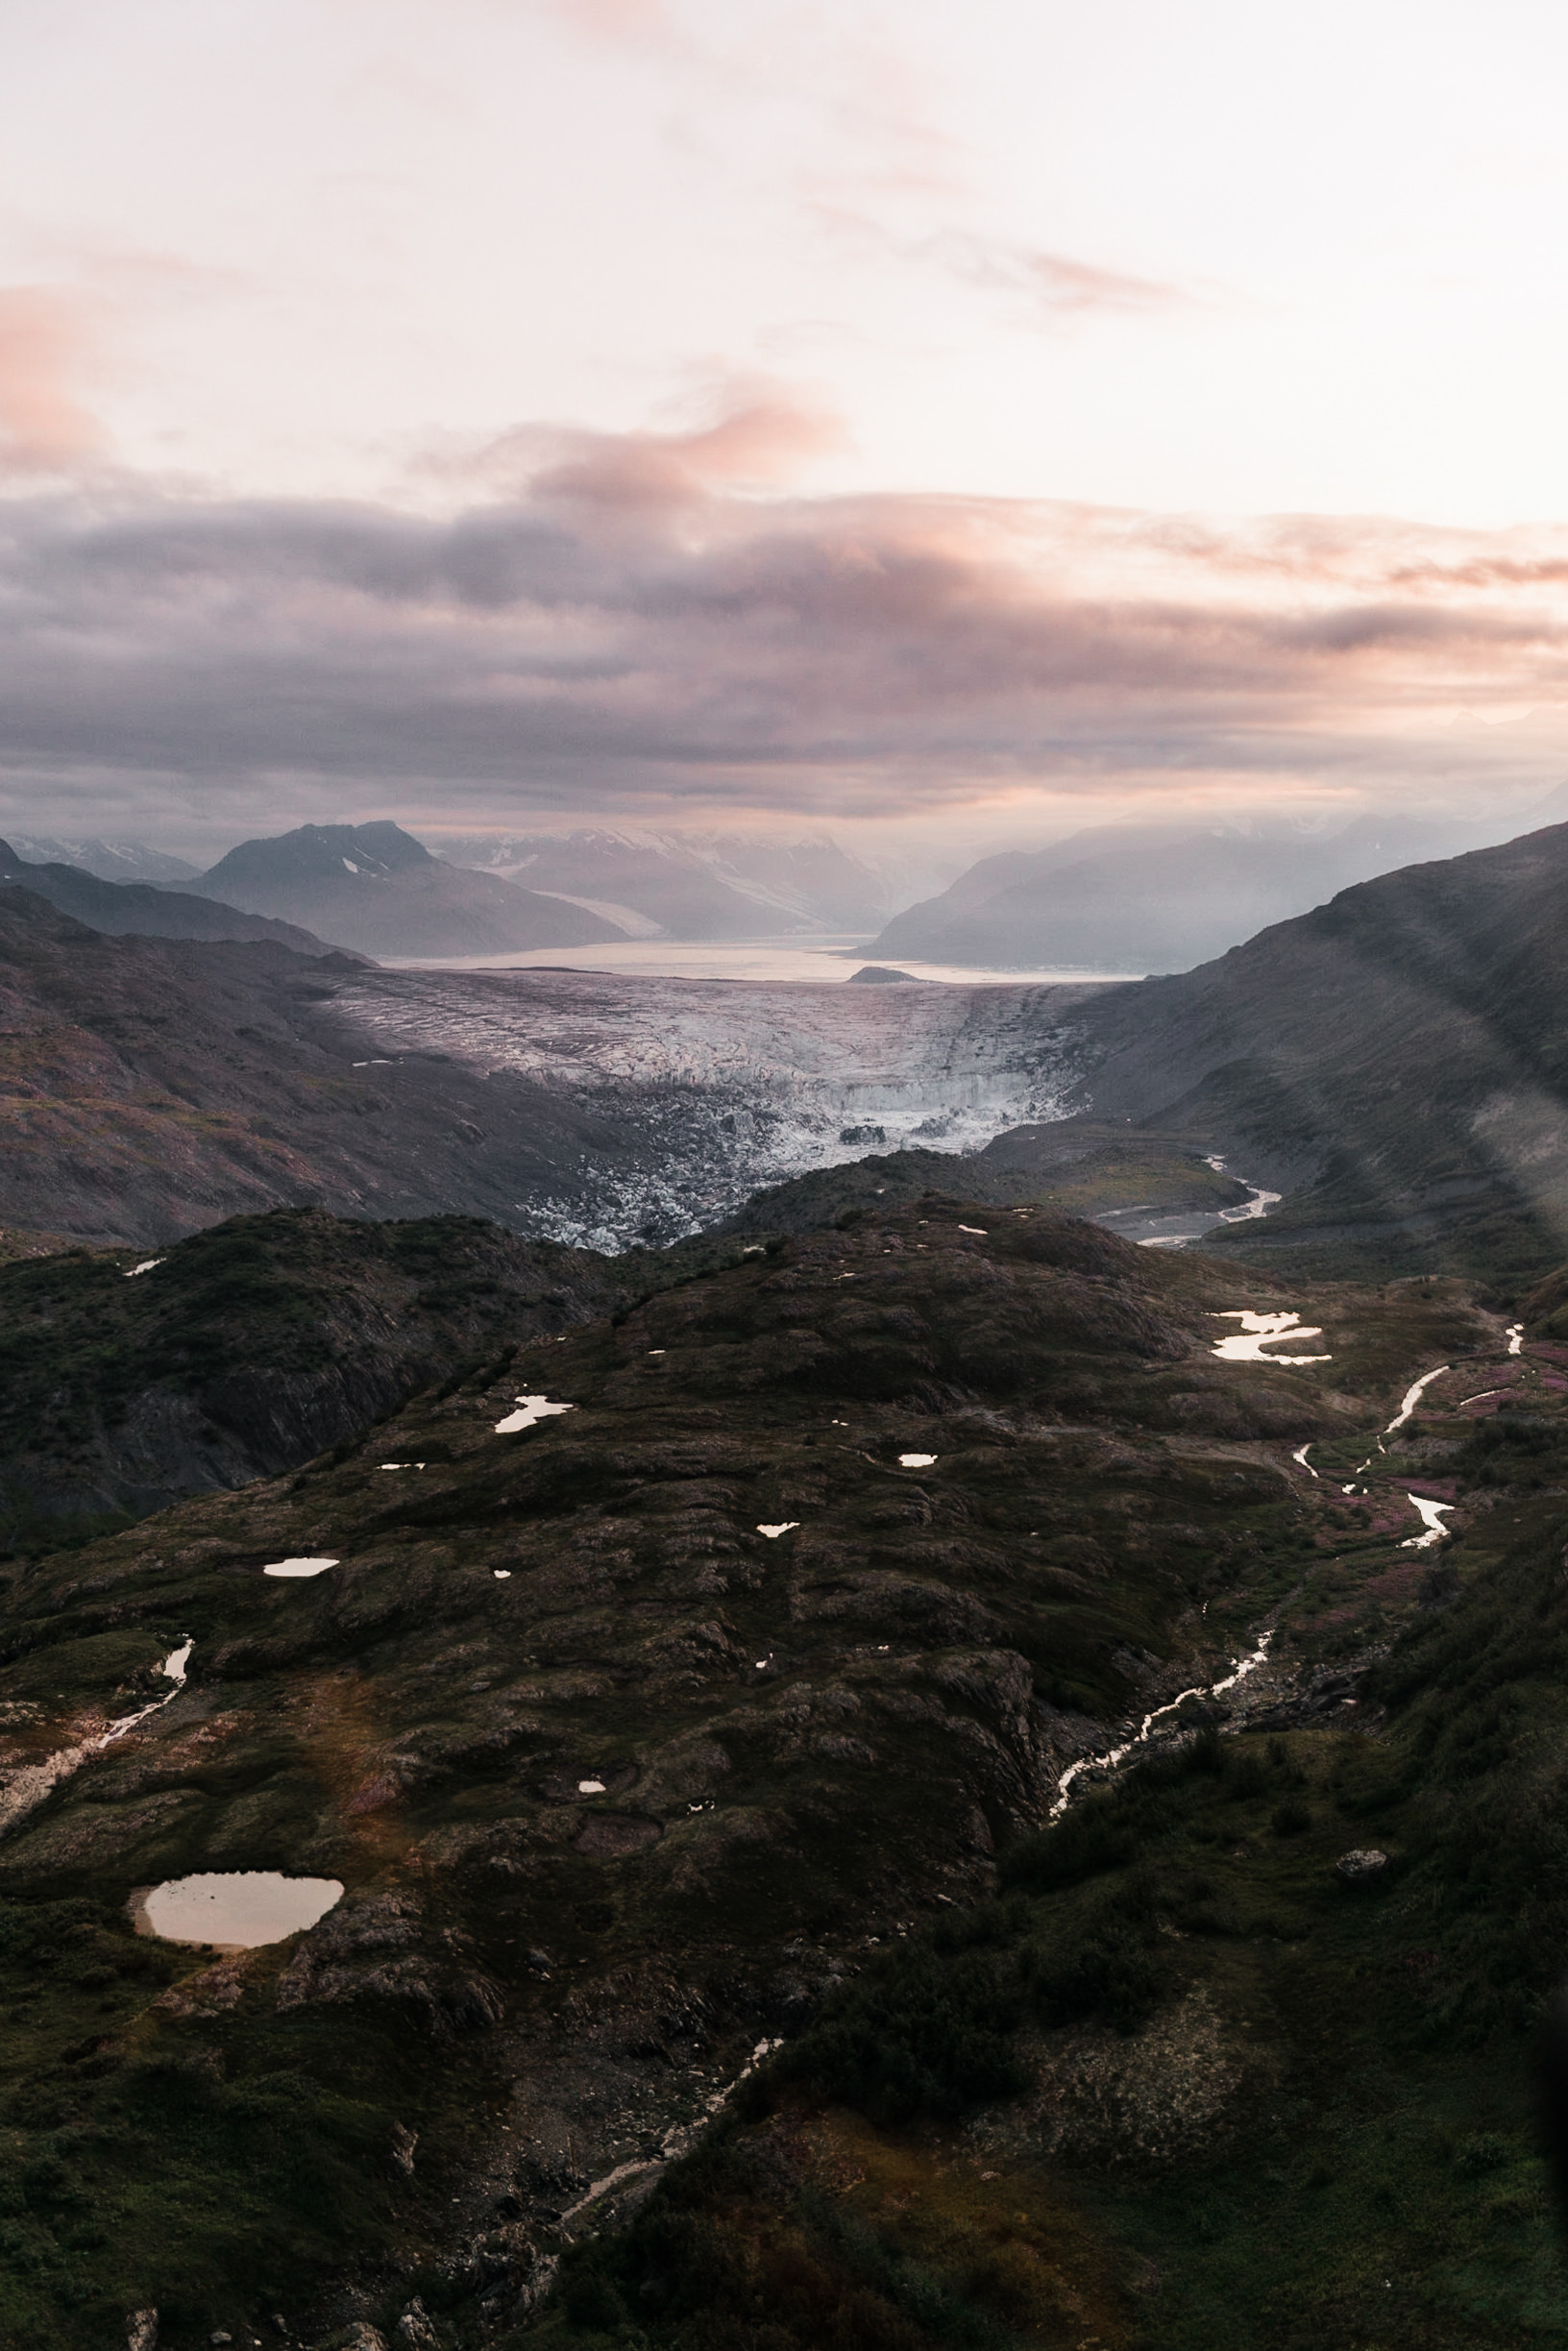
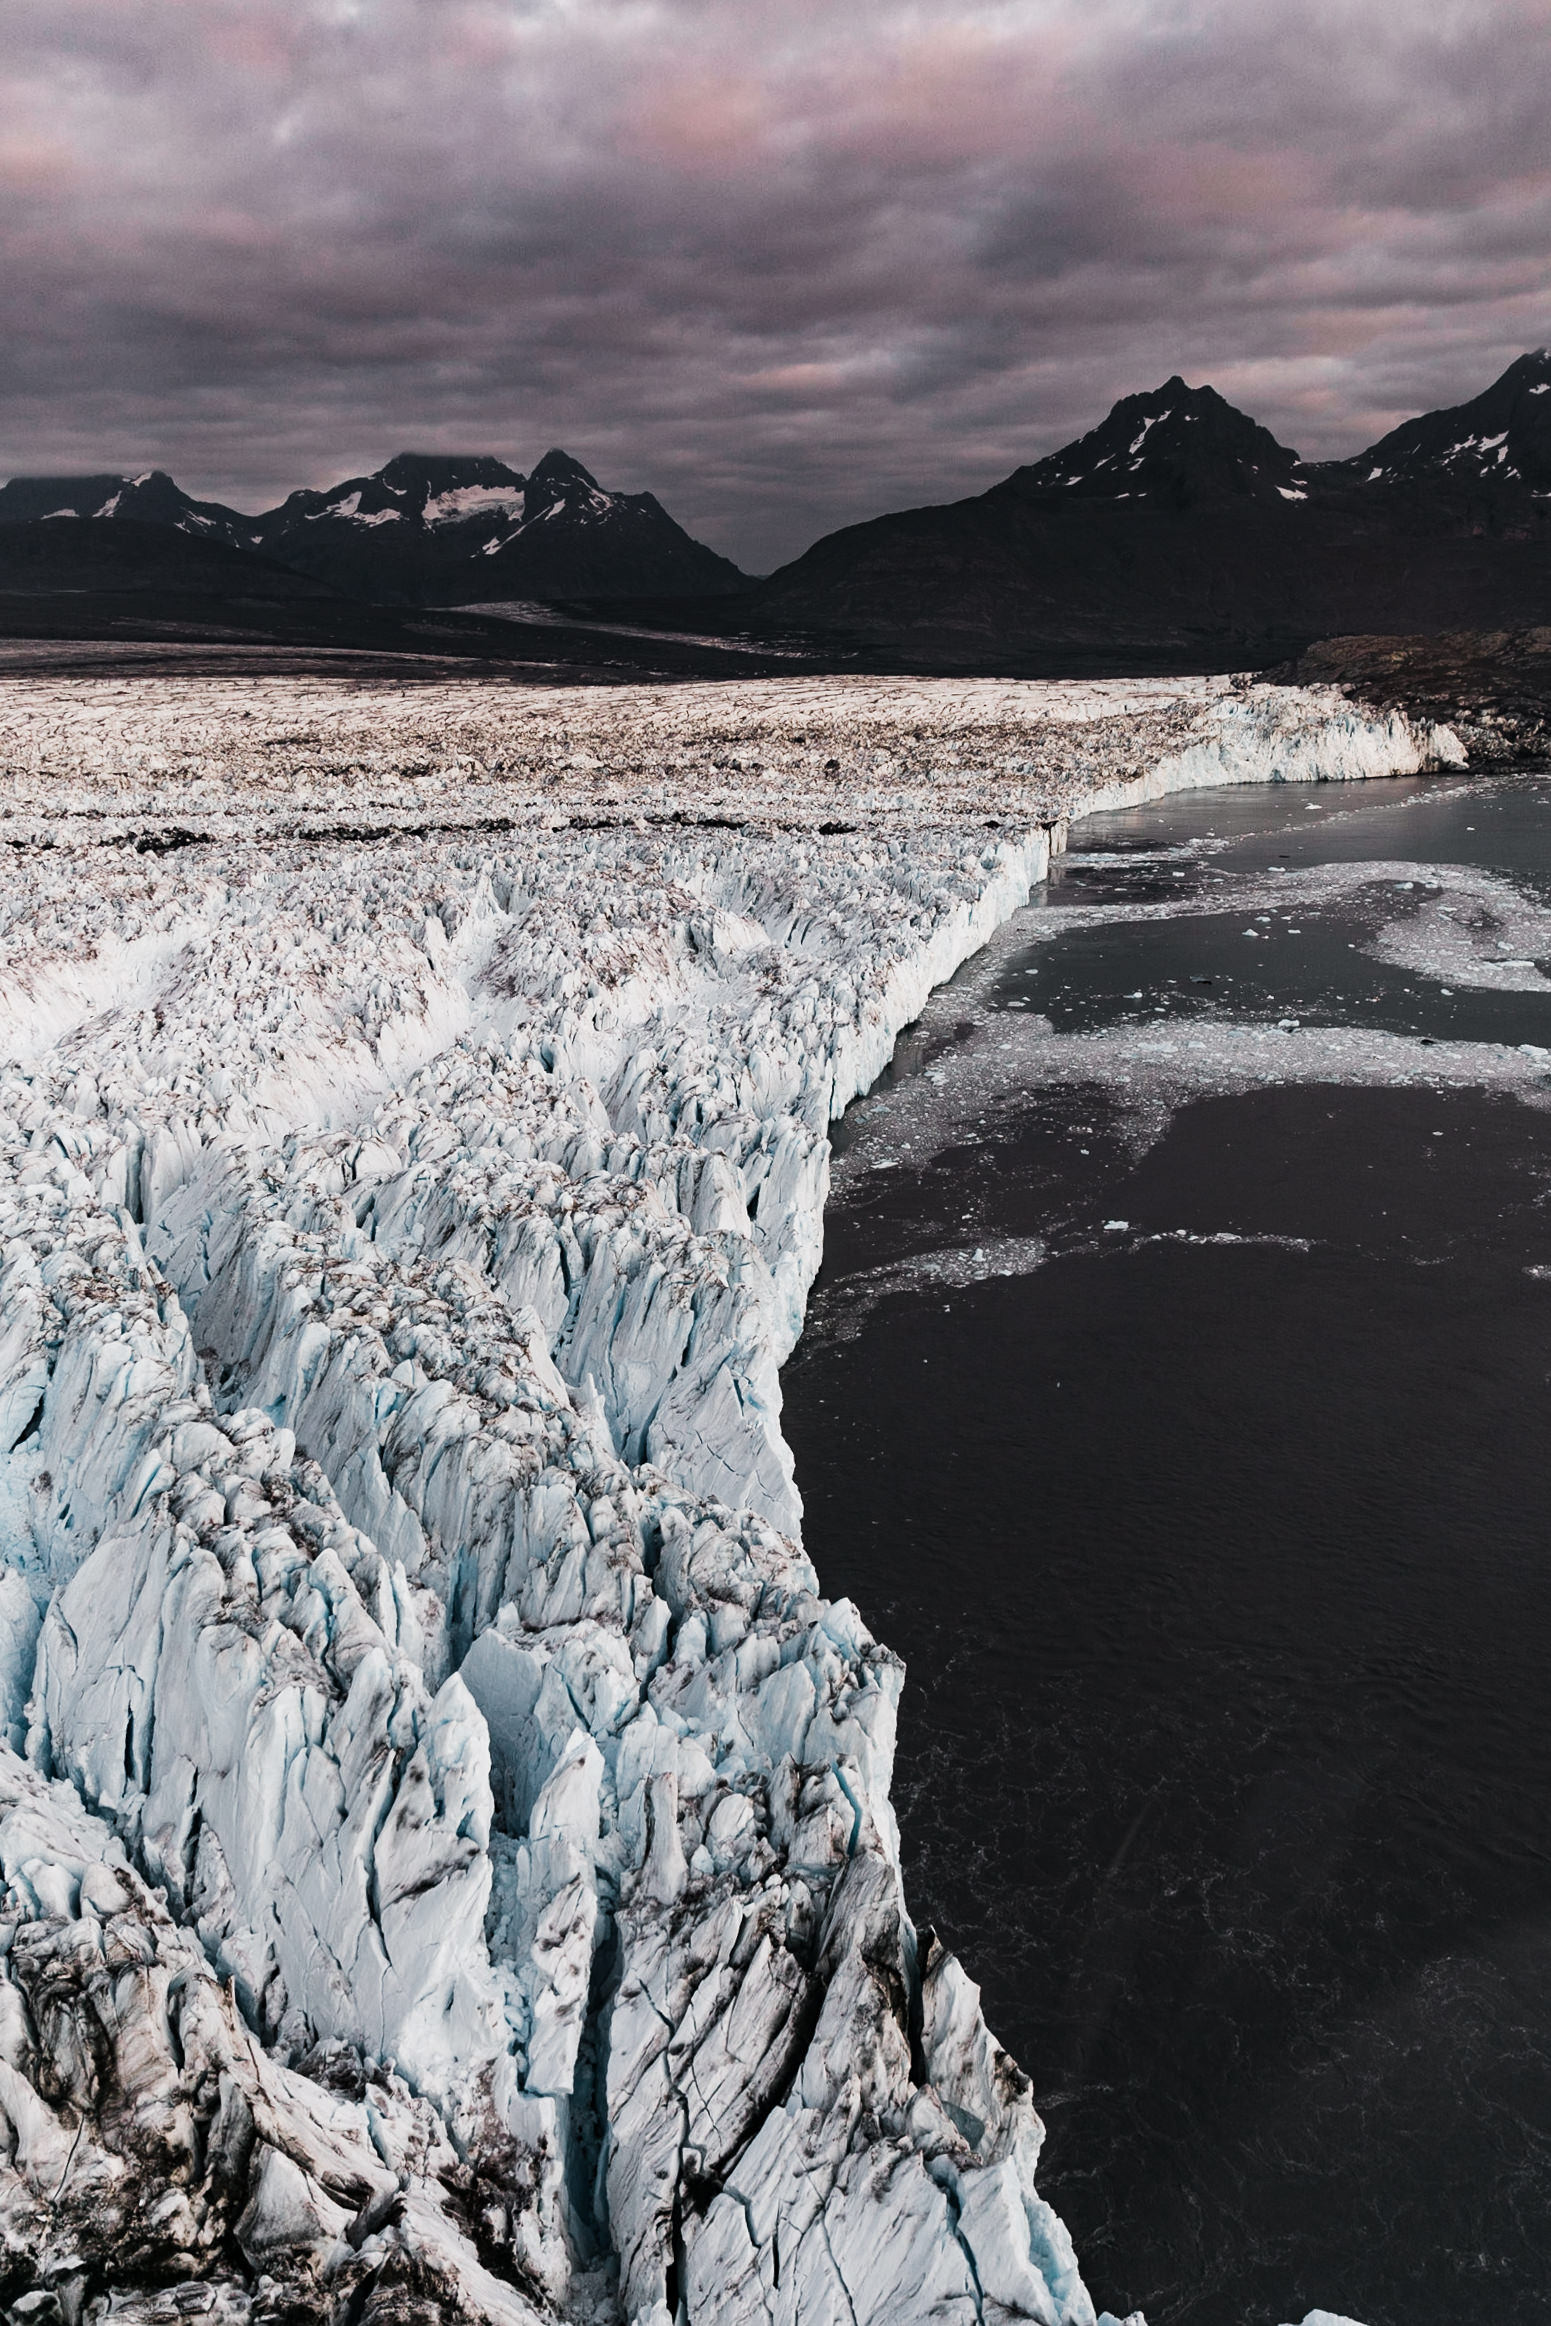
While I personally prefer helicopters for the maneuverability and larger windows, it’s also important to take into account the distance you’ll need to travel. Helicopters are much more expensive to fly than airplanes, so the prices will be much higher to book them. If you’re traveling far (more than 50 miles) I would reccomend going with a plane. But for closer destinations (like just outside of town, or in a nearby National Park), a helicopter might be worth the higher price. For instance, when we flew to a glacier near Seward, the flight over to the glacier was only 8 minutes! We took a helicopter, and I was glad we were able to maneuver much more, dip lower into the canyon, and circle back to certain areas when we wanted to. On the other hand, when we flew to Gates of the Arctic National Park, we took a small plane and ended up flying over 500 miles — I don’t even want to know what that would have cost in a helicopter!
Pros of Aerial Photography from a helicopter:
-Larger windows, typically nicer glass that is easier to shoot through
-Maneuverability to go forward, backward, and side-to-side
-Safer to get close to objects
-Hover in one place
-Sharper turns
-More precise landings and take-offs (no need for an airstrip)
Cons:
-Higher cost
-Sometimes the clear curved windows have more reflections
-Less efficient, worse for the environment
-Less payload for gear
Pros of Aerial Photography from a small plane:
-Less pricey
-You can go longer distances
-Greater payload for gear
-Typically easier to find/book
Cons:
-Less maneuverability
-Takes more time to gain/bleed altitude
-No hovering, quick turns, or going backwards
-Needs airstrip for landing/take-off
Finding and booking a flight tour for aerial photography
There are a few different ways to go about getting up in the air with your camera in hand, but the most common are airplanes or helicopters, typically booked through some sort of air service or tour company. When I’m wanting to book a flight tour, I typically start by googling “Flight Tour ___destination___” just to see what’s out there. Then I’ll read reviews, check out what type of plane or helicopter they have in their fleet, and compare prices. Note, I reccomend going with a reputable flight tour company at least until you are comfortable vetting a pilot and their aircraft. This isn’t the type of thing you want to just go for the cheapest option :) Once I’ve narrowed it down to a few options, I’ll give each company a call and chat with them about exactly what I’m hoping to do. For instance, if it’s for a shoot with a couple, we typically are wanting to land somewhere for portraits. We prefer to land in a place that isn’t easily accessible otherwise, and it’s important to know how much time we’ll have when we land. While our couples do all the booking in the end, I always try to chat with the pilot or coordinator ahead of time to make sure we’re on the same page.
When flying specifically for aerial photography (like we did for Gates of the Arctic) I really prefer to talk with the pilot and make sure they have worked with photographers in the past, especially for a helicopter tour. The pricing is so high, you want to make sure you’re getting exactly what works for you! In my experience, most pilots are pretty stoked to work with someone outside of their usual tourist with a selfie-stick norm! When appropriate, I’ve also discussed getting a discount from the flight company or pilot in exchange for landscape photos, prints, or even portraits of the pilot with their aircraft.
Flight tour Companies we’ve worked with and reccomend:
Temsco Helicopters in Denali National Park, Alaska
Pinnacle Helicopters in Moab, Utah
VS Helicopters in Valdez, Alaska
Marathon Helicopters in Seward, Alaska
Seward Helicopters in Seward, Alaska
Wright Air Service in Fairbanks, Alaska

Aerial Photography: Tips for your Flight Tour
Okay, you’ve found a great pilot and aircraft, your gear is all ready, and its flight day! First, make sure your battery is full and your cards are empty. Changing these things in flight is very unideal, and it will probably make you miss a few shots! Everything happens pretty fast once you’re in the air, so you want to make sure you’re ready. I try to take my anti-nausea med about 30 minutes before the flight so it can be working before we take off. When loading up, make sure you’re near a window. In a helicopter, the front seat next to the pilot is typically the best option. In planes, the best seat varies so it’s best to have communicated with the pilot before to know which seat they reccomend! As you load up, you might have to put your pack somewhere you won’t be able to access while in flight, so make sure you have everything you need on you. When buckling in, make sure your camera is out and accessible, and I also make sure I can grab my phone easily for videos and fun selfies!
During the flight, be sure to enjoy it and don’t *just* take photos! Flying over any landscape is a surreal experience, so be sure to look around and soak it in. When taking photos, I recommend shooting more than you typically would. Shoot multiple orientations, and if you’re on a zoom lens, remember to shoot multiple variations too. As far as settings, I try to shoot a higher aperture (like F4-F5.6 ish) and higher shutter speed (1/640+ if possible) because you’re moving while you shoot, so keeping things in focus is a little more difficult. Depending on the conditions of the day, lighting can change quickly, so be sure to check your settings often.
Lastly, if you’ll be landing and getting out of the helicopter or plane, I reccomend having everything in your pack so it’s easy to get in/out without being a junk show. It’s not unusual to get out of the helicopter while it’s still running, so you need to be able to unbuckle, get your things in hand, hop out (without touching the fragile doors), and get out from the rotor wind without losing your things. And remember, with helicopters, always run out or forward, never back!! The rotor on the back is invisible when it’s running and can be extremely dangerous.

Editing your aerial photos
Once you get back, I reccomend tipping your pilot if you feel like they did a great job. I also like to get their personal contact info and offer to send them a few photos from the flight (it never hurts to make friends with a pilot!). Once you’re back at your computer, I suggest using photo mechanic or a similar culling software to sort through all the photos. It’s pretty common to end up with a lot of photos that are super similar with slight variations, so I would try to narrow it down to the best of the best. For reference, after the Gates of the Arctic flight, I’d taken about 1,000 photos and I narrowed it down to 150 favorites to import and edit. Editing these photos is very similar to how you’d edit your usual landscape, but my main advice is to use the dehaze slider because the windows often add a bit of flat haze over the image!
I hope this all helps, and definitely let me know if you have any questions or topics you’d like me to add! Aerial Photography is an amazing experience and like anything, it takes practice. Don’t be hard on yourself if your first flight doesn’t result in absolute bangers, but hopefully this post will help you go in prepared!
…
The Hearnes Adventure Photography is run by Abbi and Callen Hearne, a husband & wife wedding photography team with an emphasis on adventure. They live on the road as full-time nomads, allowing them to serve a large portion of the western US. You can typically find them in Moab, Utah or Yosemite National Park, California, with side-quests to Patagonia and Alaska. They believe love is the greatest adventure and strive to create photos that are epic, romantic, true, and timeless.
…